
Hooray! I am SO EXCITED to finally be finished with all four of the “big rosettes” in the La Passacaglia pattern – those with a double ring of stars. I’m happy with how the Liberty Tana Lawn Mabelle print in blue and red looks, too:

My overall progress looks something like this:

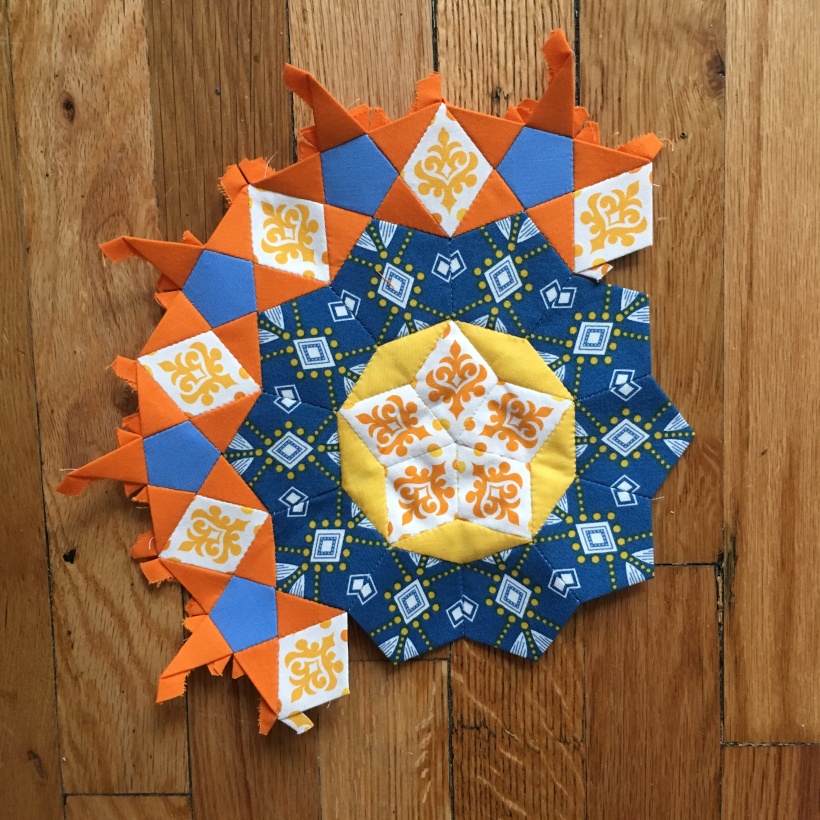
Yeah, I can’t believe I failed to blog about that little guy in the bottom middle, either. I guess I thought I must have done it when I posted to Instagram instead. Bonus rosette!
Now I’m trembling with naïve optimism that, with the most time-intensive rosettes finished, the rest of the pattern should practically sew itself and be finished in the next month or so – HA! Never mind it took me over two years to get to this point. And I will be having a baby in a month or two, depending when she decides to arrive.
Speaking of which… I have been disappointed when bloggers suddenly shift directions and turn a blog about home DIY into a blog about polar bears. Just for example. I didn’t want to do that with this blog, so feel free to check out the secondary blog I created, Building Home & Family, if you’re into home renovations and family life. We’re just starting both ventures, so I expect a lot more content should start flowing in future months!

I do have a few sewing-related posts over there:
Planning for a Market + Quilt
Free Boppy Cover Pattern
Crib Sheet to sew crib sheets
Reader Question: Is there any interest in having my family-focused sewing projects appear here, too? Or are you more interested in quilts-and-only-quilts? Most blogs seldom receive much feedback anymore, so it’s difficult to anticipate what readers might want without going the ol’ trial and error route.
That said, there is one question that keeps popping up in relation to this blog, and I thought I’d answer it here for posterity:
Q: How do you create your “progress” images for the La Passacaglia?
A: It’s really time-intensive. Kind of like hand sewing the Passacaglia itself. But if you’re still interested, read on…
Step 1: I used the pattern image from the book and desaturated it (i.e. turned it from color to black and white). Don’t have the pattern? It’s in the Millefiori Quilts book, available here. (The vendor I used is sold out, but the linked Etsy shop owner is someone I met through the DCMQG when I lived out east, and she’s great.)
Step 2: I photograph my latest rosette finish, preferably against a neutral background to make editing easier.
Step 3: In Photoshop, I open the photo and delete/remove the background, including the extra “tails” on the triangles of the rosette to get a clean shape.
Step 4: Finally, I open the full pattern image, copy and paste my newest rosette, and resize/transform/rotate it until it covers the space allocated in the pattern. I aim for “pretty close” vs. perfect because even an overhead photo of a rosette tends to have at least a little bit of angle that makes the proportions a tiny bit wonky.
A few people have asked me to share some of the templates I’ve created for my personal use in designing my La Passacaglia, but I think it’s important not to violate the designer’s intellectual property rights. She worked hard on the design, folks! Given all the hours I’m putting into my quilt, I feel the cost of the book is probably the lowest per-hour book cost I’ve ever spent! And I DEVOUR books!
Check out my WIPs page for links to all my La Passacaglia posts.
