East Dakota Quilter


1 Comment

Pajama Pants: A Range of Sizes and Styles to Consider

My family was fortunate to spend Christmas 2020 together. We accomplished this feat, despite COVID restrictions, by putting all three households in complete lockdown for two weeks prior to the visit. I am aware how incredibly privileged that makes all of us, and I don’t take the gift of that time together lightly. We were tested before and after our trip and had no positive results.

I may have gotten ahead of myself this year. I figured that if we made getting together work during the height of a pandemic, it should be even easier in 2021. I ordered fabric to make matching pajama pants for all the girls in my family (my mom, sister, two daughters, and me). Now it is starting to sink in that with the Delta variant, opening economies, and two kids too young for vaccination, we might wake up to different trees Christmas morning. But since we won’t know until it’s too late to make the final call on my sewing project, and since I already invested in some gorgeous Rifle Paper Co. fabric, I’m going to plod ahead anyway. I will ship the pants and make a collage of photos if needed.

I am hoping for a fairly uniform look but am working with a variety of sizes: infant, toddler, “standard” women’s sizes, and an extended size range. It would be easiest for me if I only had to buy two patterns, one each in child and adult women sizes.

Below is a summary of the patterns I considered for adults. I thought others might find it useful to see what options I found in expanded sizes, factors I considered in selecting a pattern, and which pattern I ultimately chose. The three top contenders were:

Loungewear PJ Shirt & Pant Set by Style Arc

Pros: Prettiest pattern option available in a wide size range; easily my top choice if not for the challenges below.

Cons: Pattern is not layered; each size is a separate file, which makes grading difficult. Designer is known for “sparse” instructions, which worries me as a novice at garment sewing.

Spinifex PJs by Muna and Broad

Pros: Simple-looking pattern with pretty trim; the piping adds interest to the pants.

Cons: Cropped tops are not flattering on me personally. Pant cuffs are presumably cut separately so add a sewing step.

Dani Pant by True Bias

Pros: Stylish pant, simple construction

Cons: Afraid it could look diaper-like with a large tummy. Must purchase separate patterns for size range 0-18 and 14-32.
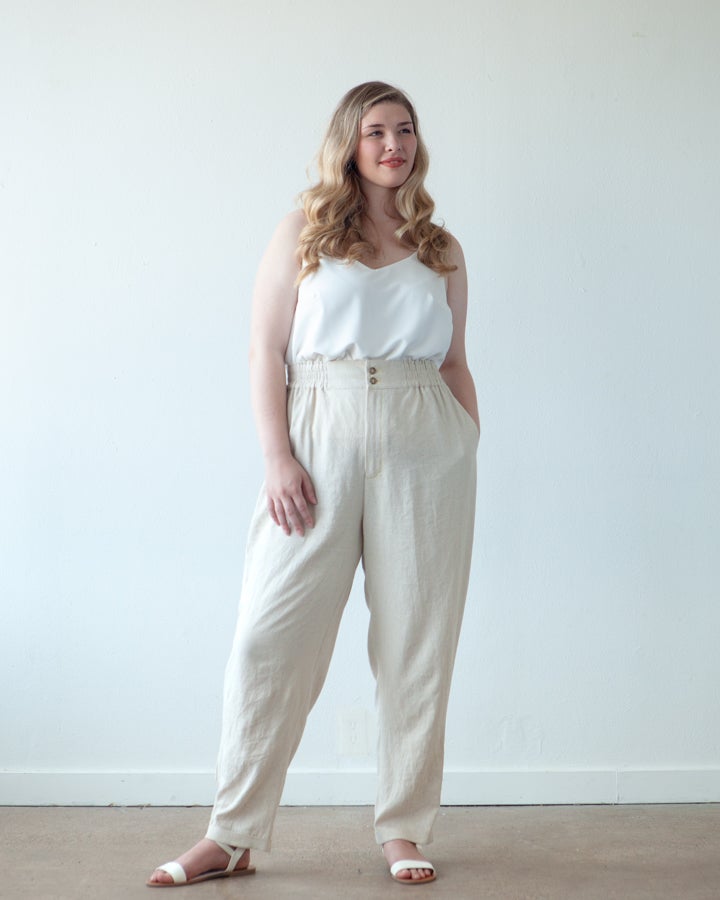
Also considered:

Emerson Pants by True Bias (pleated front)

Crew Trousers by Chalk and Notch (tie front)

Carolyn Pajamas by Closet Core Patterns (max size is 20; on the list for expansion per Instagram comments on 1/14/21 post; hack for wide leg exists from designer)

Birchgrove Pants by Muna and Broad (balloon shape? similar to Dani Pant w elasticized waist)

Glebe Pants by Muna and Broad (VERY wide leg for pajamas)

Calder Pants by Cashmerette (VERY wide leg for pajamas)

Magna Pants by Cashmerette (from book Ahead of the Curve, which I pre-ordered; U.S. publication postponed from Oct to Nov, and with any subsequent delay, it would be too late for my slow skills)

Hacking: Trying to use the Spinifex instructions with the Loungewear pattern pieces.

I think I’m going to go with the Dani Pant by True Bias for my sister and me. I don’t know whether my mom would also consider wearing these or whether I’ll have to do a second option for her. I am really, really worried about the stomach fit for the apple shapes in our family. I am reminded of a favorite saying from one of my aunts: “Just because it goes around doesn’t mean it fits!”

I’m not very advanced at garment sewing, so I’m not convinced I could do the Loungewear sewing without good instructions and grading options. It’s a pity because I think the pattern looks amazing. I’m waiting with bated breath for the Carolyn Pajamas and am also very excited for the Magna Pants publication. They won’t work for this particular project but are patterns I fully expect to try in the future.

Wish me luck. There’s no way I can sew double the number of pajama pants needed, so I will cut DIRECTLY into my fashion fabric! *gasp*

I sew very slowly and have Halloween to contend with in the meantime, so hopefully I will have a late December (early January) update with my finished makes!

Leave a comment

Still Farming

You know that Farmer’s Wife quilt I abandoned in 2015? I started working on it again. Maybe it’s the pandemic, maybe it’s because I have a second daughter who is the intended recipient. Maybe it’s because the fabric pulls took too much shelf space. Whatever the reason, I have two new blocks to share.

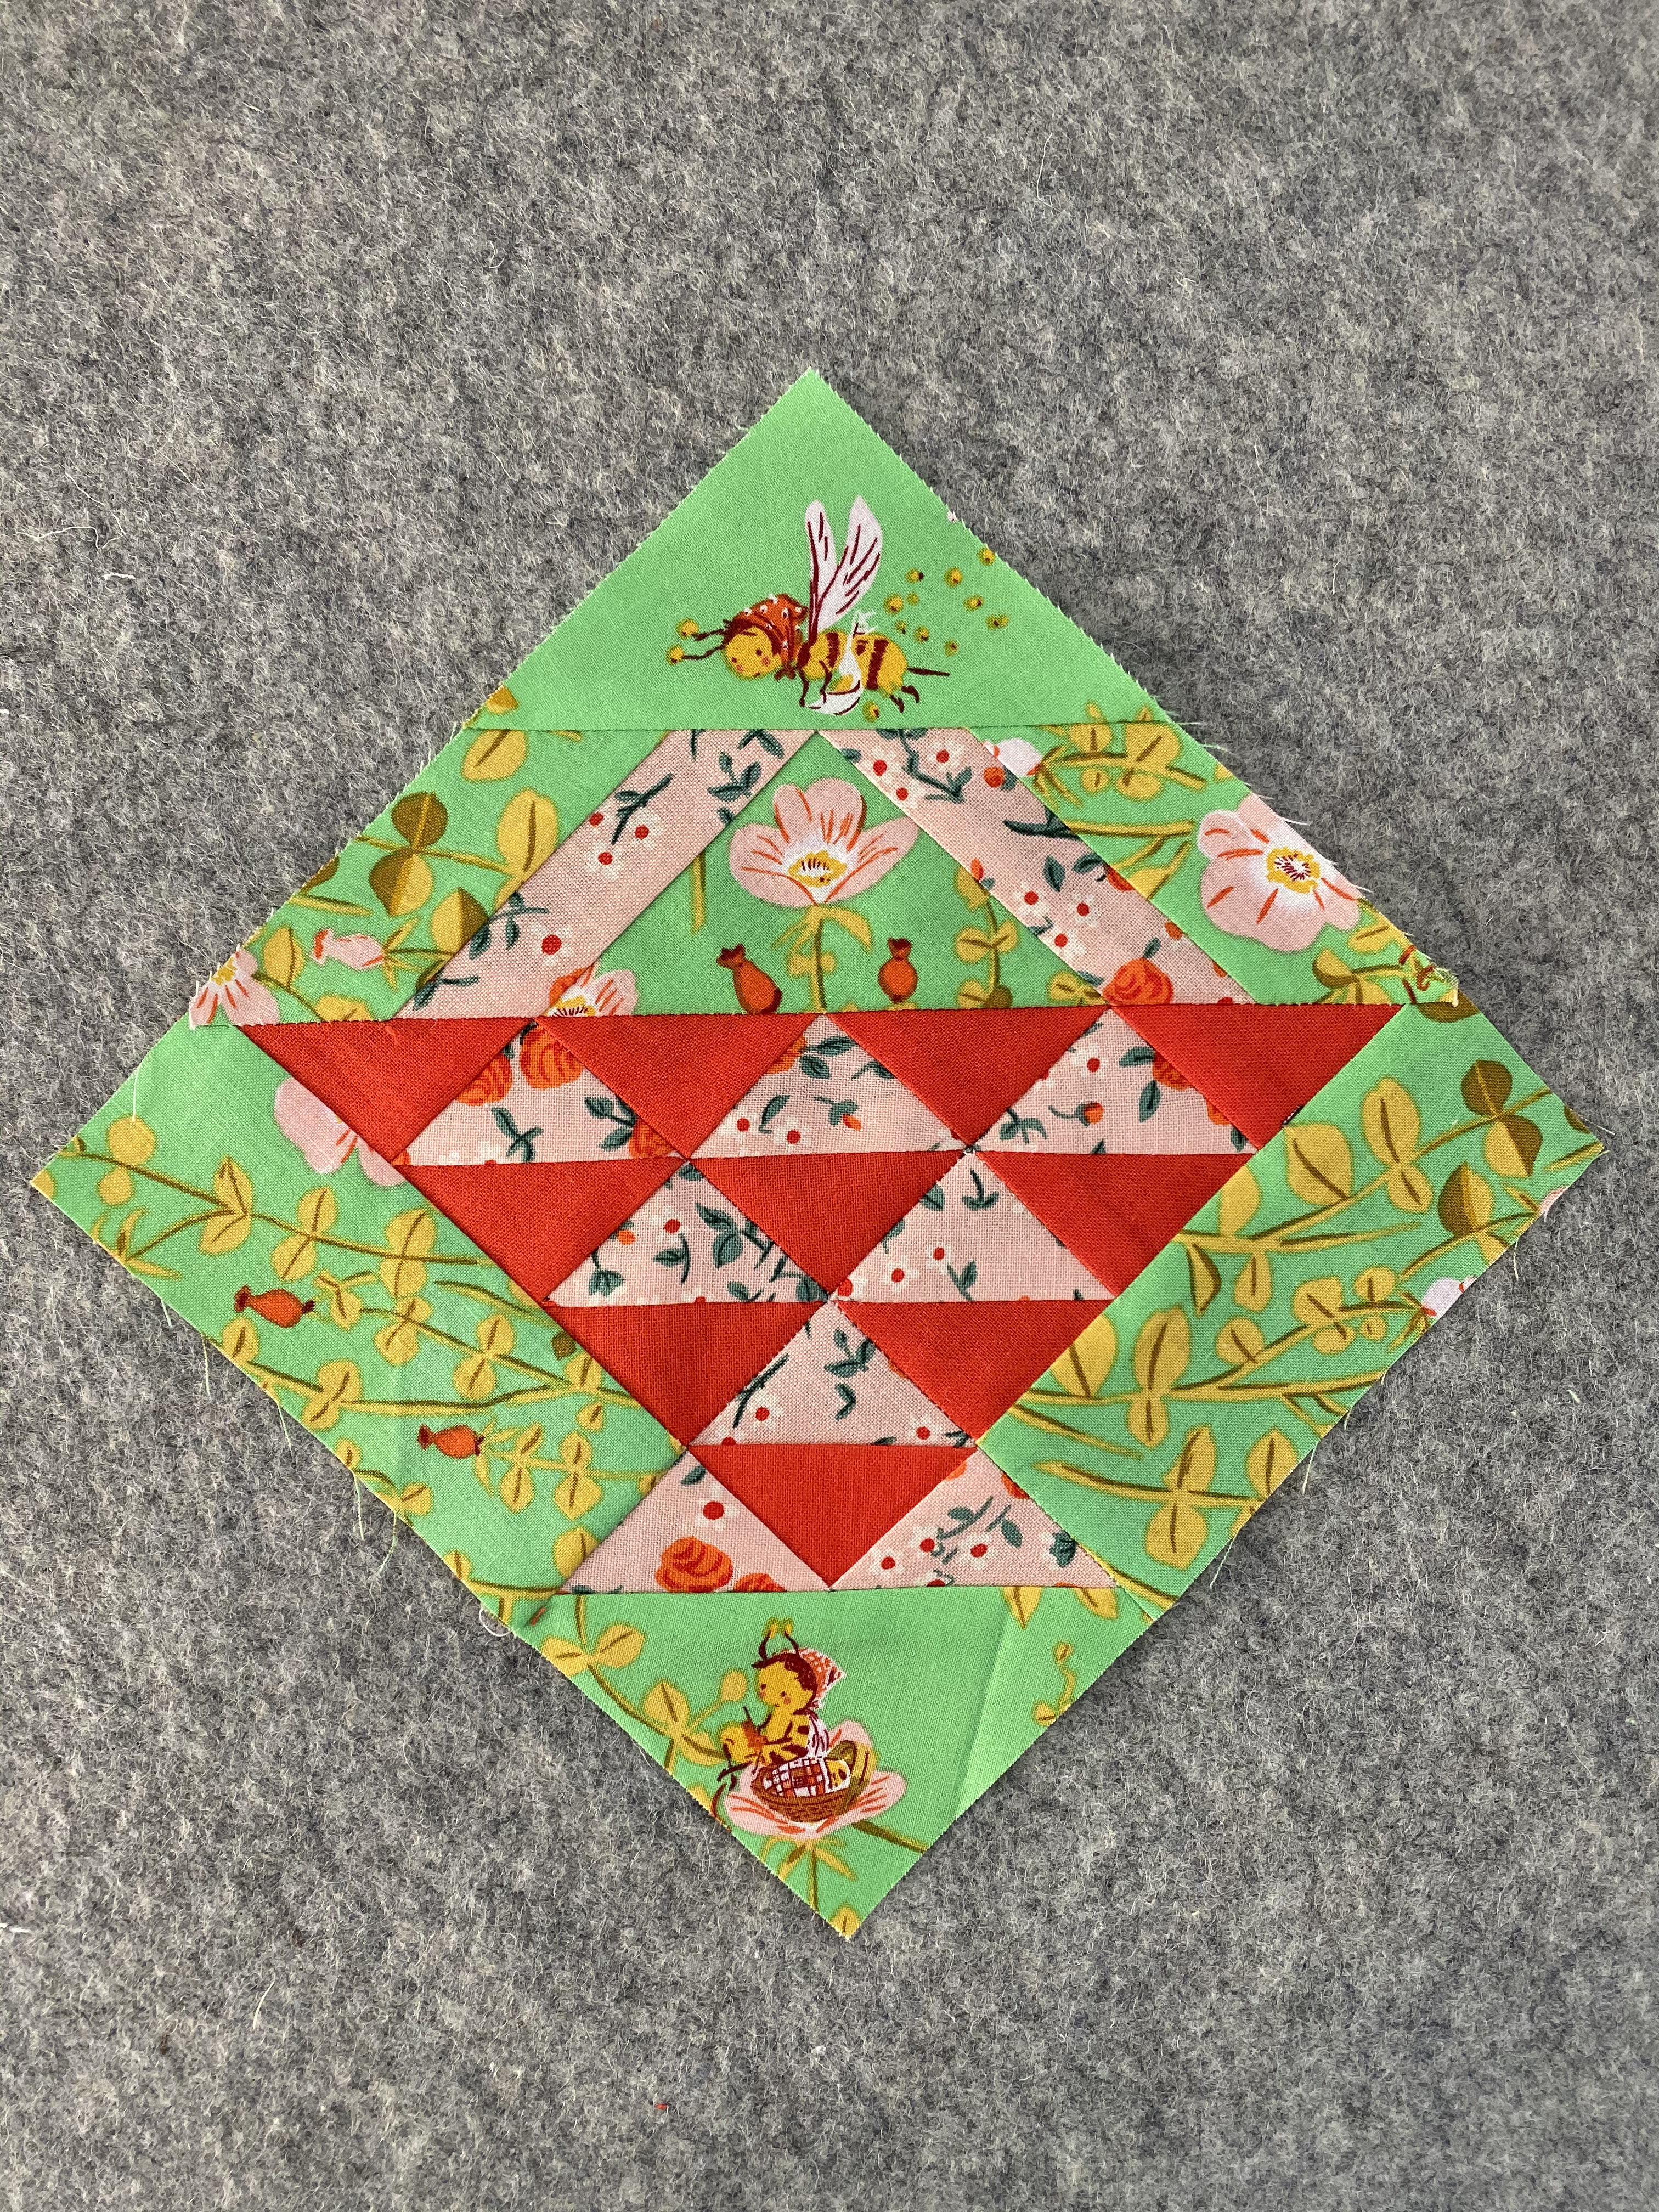
11. Bea

I confess, I had a little fun with the name of this one, opting to go very literally with bees (Bea/bee). My three-year-old LOVES bees right now, and I thought: what better fabric to make a mask than the hoarded piece of Heather Ross bees?! But before I could decide which cuts to make for the mask, I had to be sure I had the right pieces for this quilt. I am nothing if not loyal, and that fabric was allocated in 2015!

If I had the block to do over again, I would do a better job varying the saturation and color of the background vs. the basket. Oh well. I can’t even say “live and learn” because I have made this mistake before and ignored all my instincts and past learnings when pulling the coordinating fabric. Maybe it’s a block only a mother could love.

95. Sylvia

I chose to work on this block next because of the imminence of el Día de los Muertos and Halloween. I went full-saturation with this one, too, but liked the effect much better.

Work Station

Since there are 99 blocks in this paper-pieced quilt (!!!), I decided it was worthwhile to acquire a few gadgets to make piecing the blocks faster.

First, I got a wool pressing mat. I love the ability to press seams at my sewing machine without standing at my ironing board each time. I will note that since the whole mat heats up, it’s best not to use steam because the use of steam results in a wet sewing table beneath the mat.

Second, I got a mini self-healing cutting mat, which I also love for saving me from walking to my cutting table after each seam.

Finally, I got a quarter inch seam ruler that helps me make perfect seams quickly and easily every time. I heard others recommend it and will add to their heaping praise. It makes a fussy cut quilt block that much easier to piece.

Will I finish my quilt this year? Or will I gift it to my newborn on her wedding day? Only time will tell!


Leave a comment

La Passacaglia: Big 4 Complete!

Hooray! I am SO EXCITED to finally be finished with all four of the “big rosettes” in the La Passacaglia pattern – those with a double ring of stars. I’m happy with how the Liberty Tana Lawn Mabelle print in blue and red looks, too:

East Dakota Quilter - 4th Large Rosette

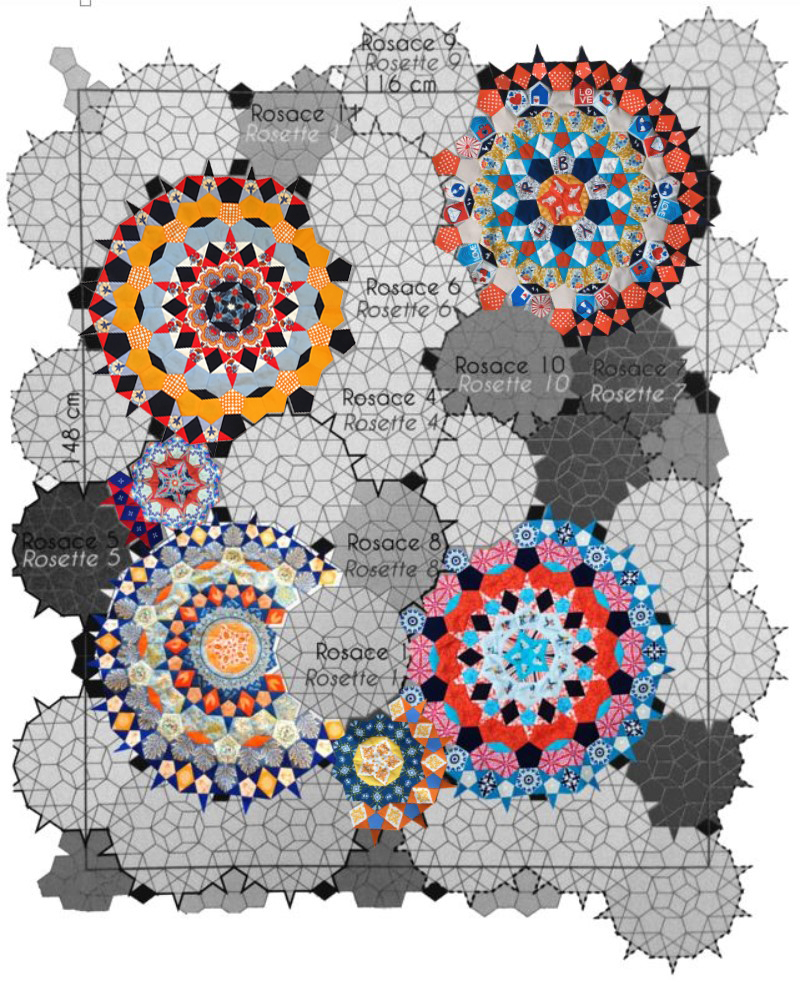
My overall progress looks something like this:

East Dakota Quilter - Passacaglia Progress
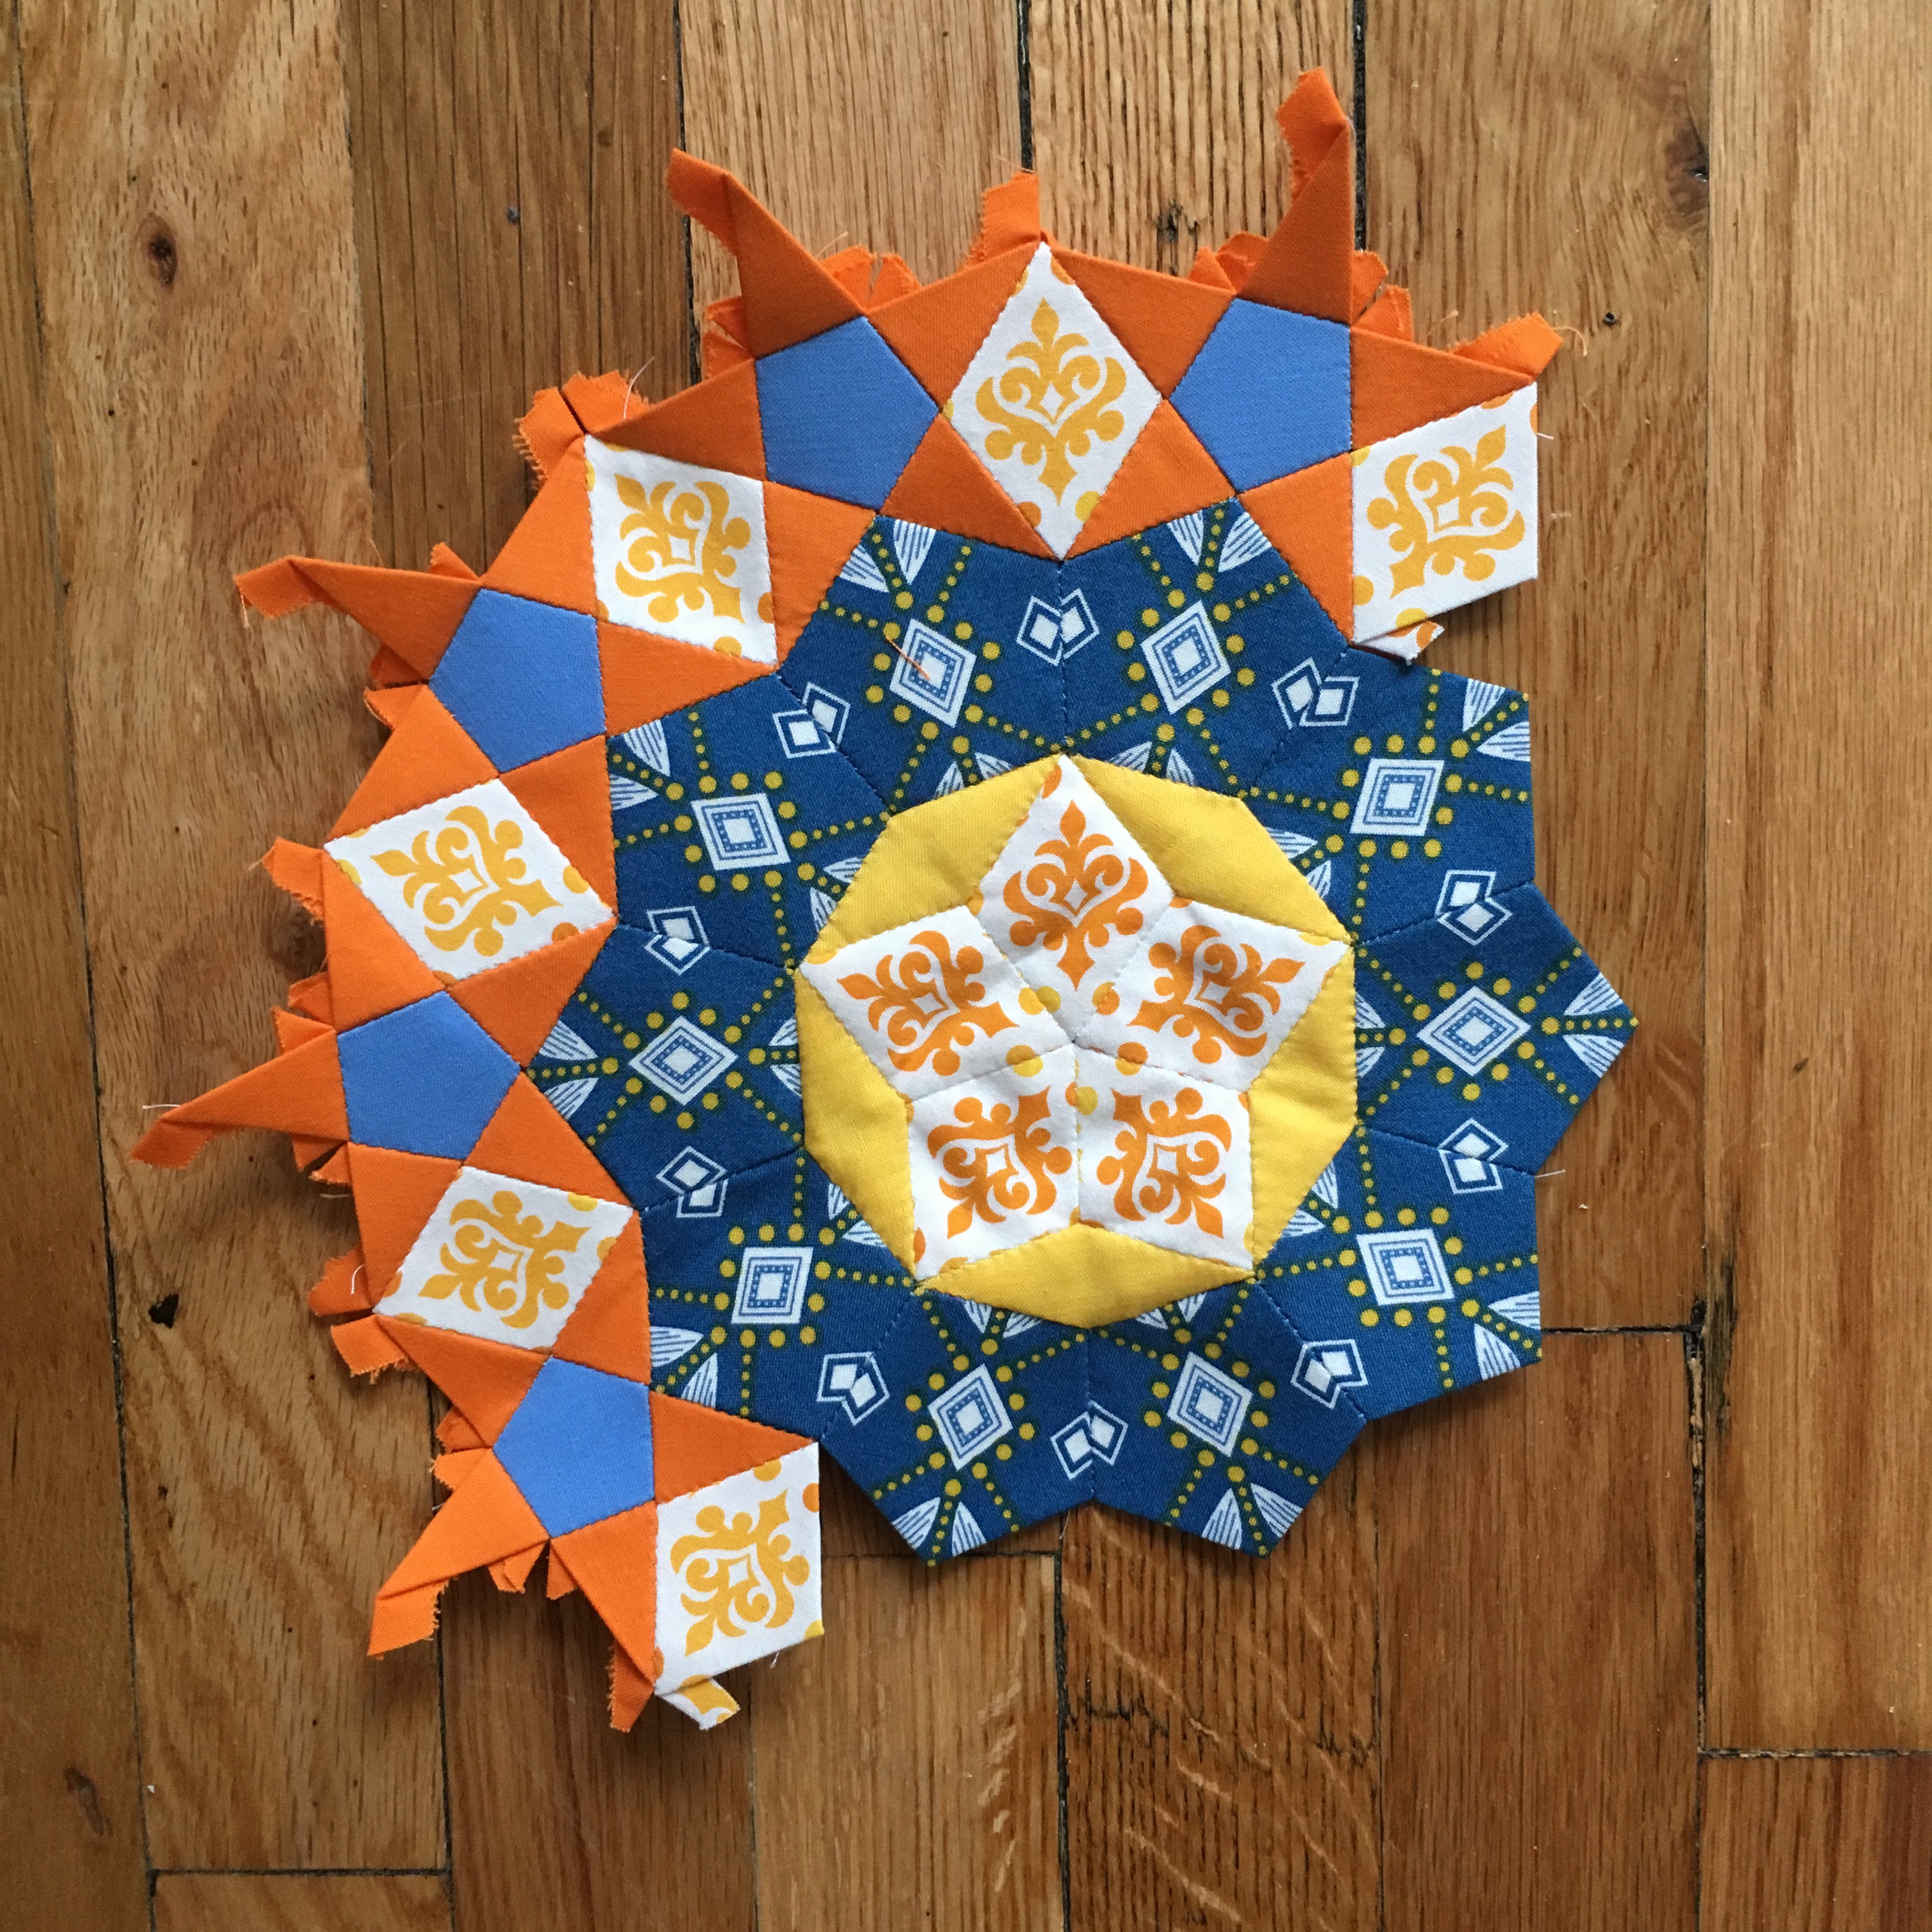
Yeah, I can’t believe I failed to blog about that little guy in the bottom middle, either. I guess I thought I must have done it when I posted to Instagram instead. Bonus rosette!

East Dakota Quilter - Passacaglia Rosette

Now I’m trembling with naïve optimism that, with the most time-intensive rosettes finished, the rest of the pattern should practically sew itself and be finished in the next month or so – HA! Never mind it took me over two years to get to this point. And I will be having a baby in a month or two, depending when she decides to arrive.

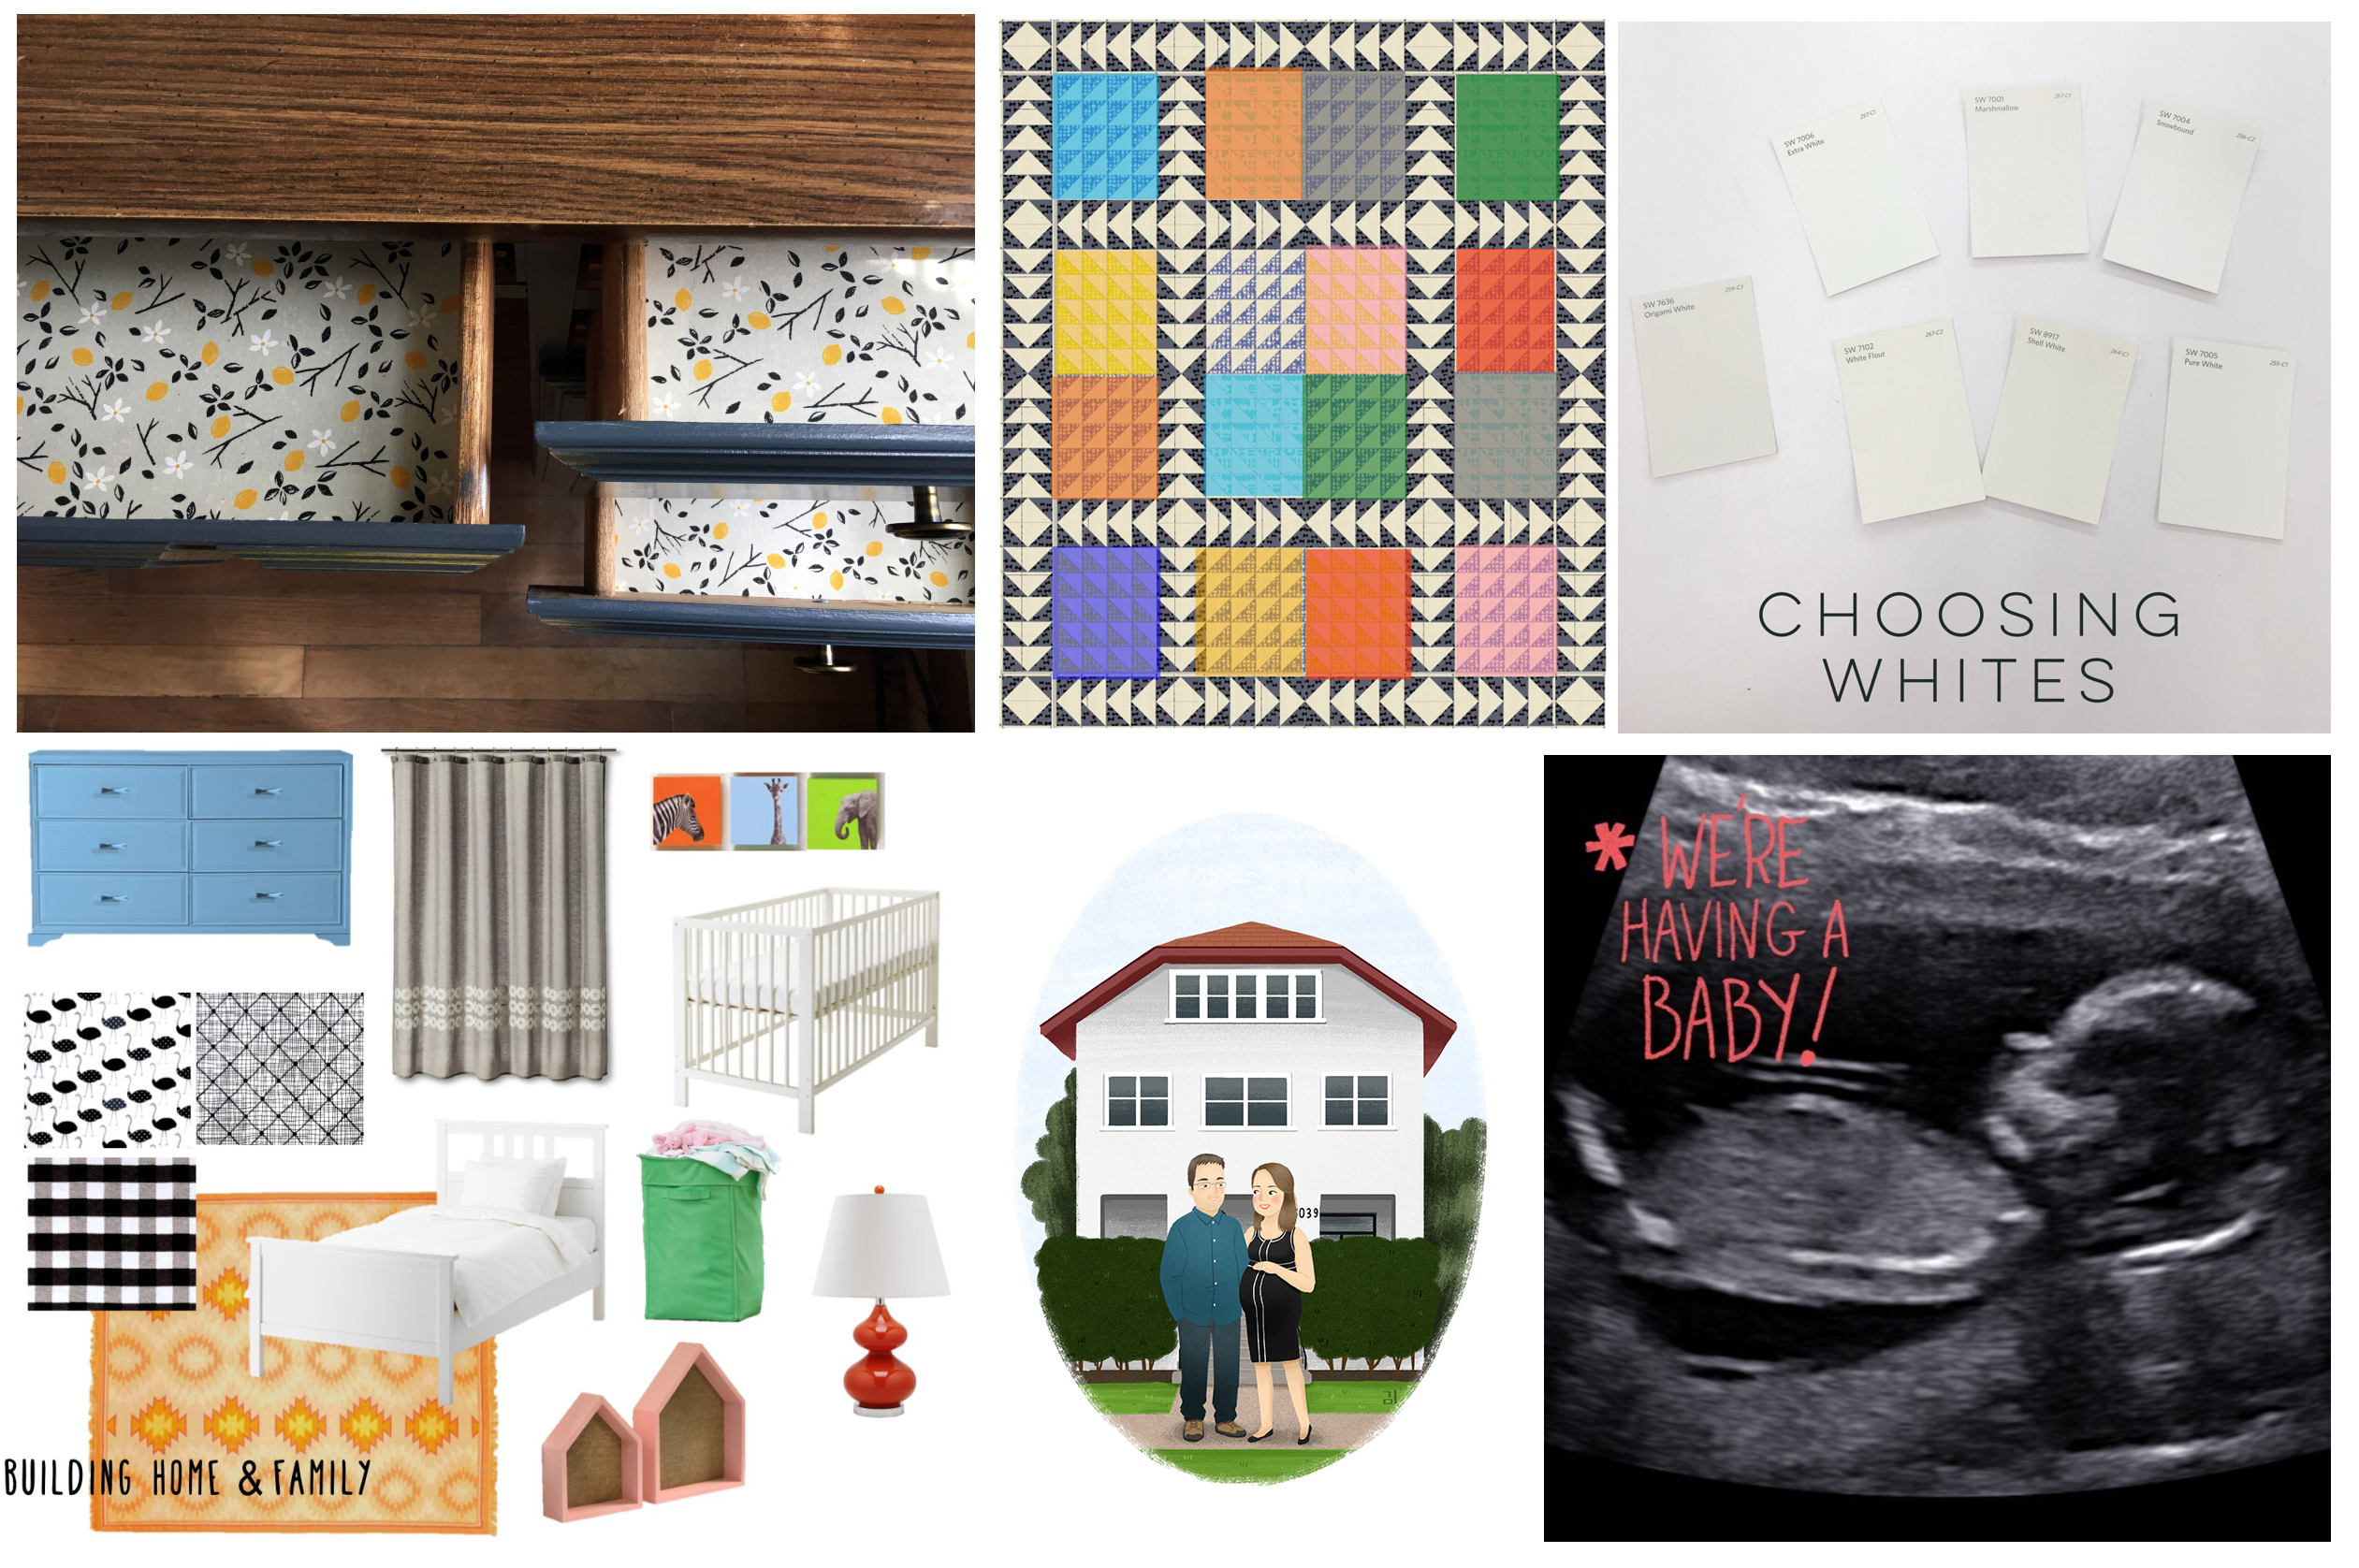
Speaking of which… I have been disappointed when bloggers suddenly shift directions and turn a blog about home DIY into a blog about polar bears. Just for example. I didn’t want to do that with this blog, so feel free to check out the secondary blog I created, Building Home & Family, if you’re into home renovations and family life. We’re just starting both ventures, so I expect a lot more content should start flowing in future months!

Building Home and Family Collage on East Dakota Quilter

I do have a few sewing-related posts over there:

Planning for a Market + Quilt
Free Boppy Cover Pattern
Crib Sheet to sew crib sheets

Reader Question: Is there any interest in having my family-focused sewing projects appear here, too? Or are you more interested in quilts-and-only-quilts? Most blogs seldom receive much feedback anymore, so it’s difficult to anticipate what readers might want without going the ol’ trial and error route.

That said, there is one question that keeps popping up in relation to this blog, and I thought I’d answer it here for posterity:

Q: How do you create your “progress” images for the La Passacaglia?
A: It’s really time-intensive. Kind of like hand sewing the Passacaglia itself. But if you’re still interested, read on…

Step 1: I used the pattern image from the book and desaturated it (i.e. turned it from color to black and white). Don’t have the pattern? It’s in the Millefiori Quilts book, available here. (The vendor I used is sold out, but the linked Etsy shop owner is someone I met through the DCMQG when I lived out east, and she’s great.)

Step 2: I photograph my latest rosette finish, preferably against a neutral background to make editing easier.

Step 3: In Photoshop, I open the photo and delete/remove the background, including the extra “tails” on the triangles of the rosette to get a clean shape.

Step 4: Finally, I open the full pattern image, copy and paste my newest rosette, and resize/transform/rotate it until it covers the space allocated in the pattern. I aim for “pretty close” vs. perfect because even an overhead photo of a rosette tends to have at least a little bit of angle that makes the proportions a tiny bit wonky.

A few people have asked me to share some of the templates I’ve created for my personal use in designing my La Passacaglia, but I think it’s important not to violate the designer’s intellectual property rights. She worked hard on the design, folks! Given all the hours I’m putting into my quilt, I feel the cost of the book is probably the lowest per-hour book cost I’ve ever spent! And I DEVOUR books!

Check out my WIPs page for links to all my La Passacaglia posts.


4 Comments

La Passacaglia – 3rd & 4th Rosettes

My progress on my La Passacaglia continues slowly. In the meantime, I finished some Christmas projects (in March!) and generally enjoyed a break from most sewing.

Since my last Passacaglia post, I’ve added two new rosettes, one large and one small. My original plan was to work on all the large rosettes first to have the best idea of what my finished quilt would look like. I have revised the heck out of that plan! The smaller rosettes are infinitely faster to finish, so I’m trying to pepper those in so I feel like I’ve at least made some progress! Here’s what I have so far:

Progress4

My 3rd rosette was especially fun because it doubles as a quilt label. My new husband’s last name is Bayer, which he pronounces as “bear.” (I use two syllables.) I incorporated both Bayer and bears into the rosette. And a few hearts. ❤

IMG_6034

Here’s a closer view from a progress shot:

IMG_2289

And this last rosette is the one I made after starting rosette #3 but before finishing it because it took FOREVER. (I mean every single one of those capital letters!)

IMG_5239

As you can see, my blue-and-orange color scheme also incorporates some reds and yellows.

Early on, I made a coloring template for my Passacaglia in MS Word. I didn’t share it because I was concerned about copyright laws and didn’t want to steal the work of a designer. That said, the Passacaglia is everywhere, and others have made their coloring sheets publicly available. Theirs are also better than mine because all the shapes actually line up, haha. If you’re interested in a free La Passacaglia coloring sheet, I used the one I found here.

Check out my WIPs page for links to all my La Passacaglia posts.


4 Comments

1930s Farmer’s Wife Quilt-A-Long: 5 Blocks Complete!

If I make blocks in a different order from the officially organized quilt-a-long (QAL) and even change some of the blocks, am I still a QAL participant? I’ve decided the answer to that question is yes! And today I’m here to share the blocks I’ve completed so far. This QAL is graciously being hosted by Kerry, whose blog is VeryKerryBerry. Check it out or follow her Instagram hashtag (#FW1930sQAL) for more inspiration.

Block 18: Carol

As part of the blog hop, I completed Block 18, “Carol.”

18 Carol by East Dakota Quilter

For those who aren’t aware, block patterns come from the book The Farmer’s Wife 1930s Sampler Quilt. Each block is paired with a letter that was written by a farmer’s wife and submitted to the magazine The Farmer’s Wife in the 1930s during the Great Depression. The letters provide a snapshot of life in that decade, but the letters selected for publication also tend to be uplifting, which is remarkable considering the challenges faced by farmers at the time.

The letter paired with my block was one of my favorites. You’ll have to buy the book to read the whole thing, but the gist was that by having a radio, the writer felt she sometimes knew more about what was happening elsewhere in the world than she did about her own community and neighbors. It’s crazy to think people already noticed the effects of globalization in a very real way back in the 1930s! I also love that the block shares a name with my Great Aunt Carol, someone who sewed lots of things for me through the years.

Fabric Selections

If you’ve been on my blog awhile, you might have read about what I call my Ugly Quilt. I used lots of gorgeous fabrics for what was to be my first-ever quilt, but they clashed fiercely… and so the pieces ultimately went to a thrift shop, where I wouldn’t have to repurpose my failure into a new project, haha.

Having learned from that experience, I decided the cohesion of this quilt would center around Heather Ross prints. Heather Ross is my favorite. I write about having met her in my review of QuiltCon 2015. In this quilt, I will use pieces from all her various fabric lines plus pieces cut from munki munki brand pajamas she designed (typically out of print/OOP since I discovered quilting long after she sold the brand). It’s true that not all the fabrics share a similar colorway, but I’ve decided not to worry about that for now. Please cross your fingers for me that all these lovely fabrics won’t become Episode 2: Ugly Quilt’s Revenge. Here’s a photo of about half my HR stash paired with the FW1930sQAL blocks:

(Yes, I spent a small fortune on Etsy.)

For those who are already HR superfans, you might be thinking to yourself, What the heck?! The mermaids in that Carol block are NOT in one of Heather’s original colorways. Did Tiffany STEAL Heather’s artwork? To that, I answer: nope! You should probably get your hands on a copy of the book Prints immediately. It’s awesome.

Prints - Photo by East Dakota Quilter

Included with the book is a disc of some of Heather’s artwork. The whole book is about using technology to design and change fabric, and she offers her prints as a starting point. In other words, you can customize the prints however you’d like and print them on Spoonflower! I started with the Mermaids print from the Mendocino line, making one a redhead and the other a brunette. Admittedly, she has TONS more experience with colorways than I do. I’m not sure that mine was an improvement. But it was incredibly fun to play with the prints in Photoshop. Perhaps my favorite thing about having the prints in electronic format was being able to increase or decrease the size of some so they would fit on the blocks in the Farmer’s Wife book. Each block is only 6″ finished, so many of the prints would have been too big without resizing. And where I had to choose to sacrifice either the print or the block design, I’ve decided in most cases to favor the print. You can see an example of this in one of the other blocks I completed (described below), Block 79.

Four More Finished Blocks

East Dakota Quilter FWQAL Collage 1

As I said, I’ve been sewing my blocks out of order. The first block I completed was actually Block 79, “Patience.”

79 Patience by East Dakota Quilter

This block was originally just a 9-patch block. After holding the elephant up to lots of different blocks featured in the book, I realized it wouldn’t fit on ANY of the blocks. I made the executive decision to combine several of the pieces to feature the elephant on a block. I am thrilled with the result.

Next, I completed Block 14, “Betty.”

14 Betty by East Dakota Quilter

I basically started with all the largest-scale prints and then looked for a block that had pieces large enough to accommodate them. This block not only fit the mountain top, but placed it at the top of the block like the skiers were skiing down from the top of the mountain. I made the lower left skier look like he’s falling on accident, but otherwise, I love the effect.

I took a long break after this block to sort the rest of the prints with blocks that had appropriately-sized pieces. I saved a snail print for last since it had some of the smallest images of any of the prints. So when I finished sorting, I sewed Block 6, “April.”

06 April by East Dakota Quilter

The center block actually came from a charm pack of Gardenvale fabric that I got as a freebie at QuiltCon. Pretty sweet, right?! I like how it included the snail colors but added a few more to the palette. Without the center piece, this block would have had almost identical colors to Block 79. I like how a single fortuitous print opened the door to so many options!

Finally, I completed Block 2, “Aimee.”

02 Aimee by East Dakota Quilter

This incorporates another image from the book Prints. The image was actually intended for gift tags, but I thought it would be cute for a quilt, which of course is another handmade item. Sadly, when I cut apart my Spoonflower fabric, I accidentally cut these pieces too small. I was glad I thought to save the scraps, and the scrappy look that resulted isn’t something I mind at all!

In case you’re curious, this is how my yard of Spoonflower fabric with edited images from Prints turned out:

Spoonflower Prints by East Dakota Quilter

Watch for these images in future blocks!

Thanks for visiting, whether you’re a longtime follower of my blog or visiting for the first time as part of the Blog Hop!


4 Comments

Botanics Plus Quilt: A King-Sized Success!

A little over a year ago, I got married. It was an awesome wedding. We were surrounded by friends and family. Family members included a new sister-in-law, who offered to cook for the entire guest list. And then the refrigerator of the industrial kitchen we were renting died the night before the wedding, so she cooked the entire meal again the day of the wedding!!! Perhaps the sweetest part of all is that no one told me until the wedding was over so I wouldn’t have to worry. Yep, I have the best friends and family ever.

We talked late that night about the cool air, how quilts are great for snuggling against the chill. We bonded over our preference for really thick quilts. (Even though they’re a bear to sew and I understand why others avoid making them now that I sew myself.) I told her I would make her a quilt. It might take me 40 years, I said, but I would make her a quilt.

Just before our first wedding anniversary in September, I finished her quilt! I’ve always been an over-achiever, but 39 years ahead of schedule is a new personal best!

Botanics Plus Quilt by East Dakota Quilter

By contrast, the photo might be a personal worst. This beast is king-sized. It has both wool and cotton batting. It weighs nearly 20 pounds! The day this photo was taken, I was furiously sewing on the binding (see the Clover clips to the right and bottom?). My husband and his brother were about to drive from Chicago to Colorado Springs to visit their sister, and I wanted them to be able to present it to her in person. I sewed right up until the last second and barely had time to throw it in their car before they left. I didn’t really have time to stage a photo. I took this unfinished photo while the light was still okay, realizing I’d already missed the best window and that it would be even worse when I finished the quilt. I was working from the shop of their family business, so I threw it over the lofted area and held it there with some paint cans. (It is possible one fell, broke open, and left a tiny paint mark on the almost-finished quilt, which I noticed as I put in the very last stitch. Doh!) The purpose of this narrative is not so much to apologize for the photo as to point out it perfectly captures what sewing this quilt was like!

The fabrics are from several 5″ charm packs of Carolyn Friedlander’s Botanics line, plus some charm packs of the coordinating Kona solids. (I thought some coordinated better than others.)

One final note: the quilting bar on my Janome machine made quilting the cross-hatch SO MUCH EASIER than it would have been on my Singer! The dual feed meant my top layer didn’t get “pinched” or pucker repeatedly. I thought for years that I was just infinitely less talented than every other quilter; I learned the tools make a huge difference. I even tried some free motion quilting (FMQ) along the edges. Although the plus shape is comprised entirely of straight lines, turning the quilt at every corner and jamming it through the throat space was a nightmare. Using FMQ instead was *slightly* better. I still have lots of practice ahead of me!


Leave a comment

Cut Glass Baby Quilt – Vintage Quilt Revival

I don’t buy many quilting books because I’d rather make my own projects most of the time. Vintage Quilt Revival was an exception. Almost as soon as I bought the book, I learned that Katie Blakesley was a member of the DCMQG at the time and that she’d be hosting a trunk show. When I saw her Cut Glass quilt, I fell in love.

It might be too strong to say I was hoarding the pattern, but I definitely had it in my pattern library and was waiting for an opportunity to use it! When two of my best law school friends announced they were having a baby, I knew I’d found the perfect match.

Cut Glass Baby Quilt by East Dakota Quilter

I made it baby-quilt-size instead of a regular-sized quilt because other new parents have told me they like having a mobile blanket. It can cover a stroller or car seat, protect a baby when lying in a germy public space, and becomes a “blankie” when the baby outgrows these uses.

Steelers Quilt Back by East Dakota Quilter

Not only does the back side of the quilt match the gray and yellow nursery décor, but it is also reminiscent of the Steelers’ colors – baby’s dad is a huge fan!


Leave a comment

Sew Kitschy – A Placemat Finish!

I started participating in the Sew Kitschy quilt-along (QAL), hosted by Kristy at Quiet Play, with the intent to make a quilt for my pastry chef sister. I lost steam a little before I made it halfway through. Then, when I thought I might revive the project, my sister saw the blocks and thought they might not fit her home décor bedroom aesthetic. (I guess not everyone loves BRIGHTS! haha)

I rescued the project and am able to check one UFO off my list by turning the finished blocks into placemats instead. The kitchen theme works perfectly in the kitchen! As an added bonus, the blocks match an oven mitt and some potholders I made my sister for Christmas a few years back.

Sew Kitschy Placemats by East Dakota Quilter

Here are the back sides:

Back of Placemats by East Dakota Quilter

Glad to have one more project off my list. And my cutting mat.


Leave a comment

Bonnie & Camille-Inspired Triple-Zip Pouch

August marked the last month of my #birthdayclubhandmade swap… although I’m only posting about it now! I learned a lot from hosting my first swap, and I got to know some quilters a little better since most of my “sewcializing” is done online. August’s birthday girl listed as inspiration mom and daughter duo Bonnie & Camille. I present the Bonnie & Camille-inspired triple-zip pouch!

triple-zip-pouch-front-East Dakota Quilter

(Sorry for the poor iPhone photos; I was in a hurry to post the package!)

triple-zip-pouch-swoon-back-East Dakota Quilter

I found that, although I like Bonnie & Camille fabrics, I didn’t have many in my stash. However, I had lots of fabrics that were in more or less the right colorway. I also had a Thimble Blossoms pattern: the mini swoon.

The mini swoon finishes at 8″. To fit the back of the pouch, I reduced by half. The swoon above is just 4″! Some of those HSTs are 1/2″. Who knew something so small could take so long to sew?! I know the number of pieces is more important than size in determining sewing time, at least in theory. I always forget when I decide to sew something small, haha.

Each of the interior pockets is a different color, too. I stitched a piece of vintage ribbon into the biggest pocket. It matched perfectly!

Triple-zip-pouch-interior-East Dakota Quilter

triple-zip-pouch-vintage-ribbon-East Dakota Quilter

The triple-zip pouch is a pattern I have used before on several occasions. I love it!

Triple Zip Pouch by East Dakota Quilter

Triple Zip Pouch by East Dakota Quilter

On one hand, I’m sad the birthday swap is over. It was fun watching my Instagram feed to see what others in the group had made. On the other, I can’t wait for all of my sewing time to be spent on “me projects” for awhile! I also have a bunch of big life changes on the horizon, so fewer commitments will be a good thing. Thanks to everyone who participated or followed along!


22 Comments

La Passacaglia: New Rosette + New Template

At a rate of about one rosette every two months, I’ve finally finished my second!

East Dakota Quilter La Passacaglia Fire and Ice

With saturated red-oranges, prints resembling snowflakes (at least if you squint), and wintery novelty prints (polar bears and Heather Ross/munki munki ice skaters), I call this my “fire and ice” rosette. I mentioned in earlier posts (here and here) that I plan to make my entire quilt in blues and oranges.

Progress 2 by East Dakota Quilter

I know I also said this before, but the rosettes are HUGE! I took a photo with my feet for perspective.

Fire and Ice La Passacaglia by East Dakota Quilter

Here’s a progress shot to show how I work. I got the hour basket as a swap gift for my birthday (#birthdayclubhandmade) and keep pretty much everything I need inside it so I can take it with me to the coffee shop on weekends.

Passacaglia Progress by East Dakota Quilter

Probably my rosettes would go a lot faster if I worked only on one at a time from start to finish. Instead, I usually finish the center of one, start basting (hand sewing), get bored, and sew another center or two in the meantime. I am currently started on three other rosettes.

One of my new rosettes will feature a single image in the center. Some quilters have done an incredible job of lining up individual pieces. I plan to shortcut the process and combine a few pieces at once. Here’s the process I’m using:

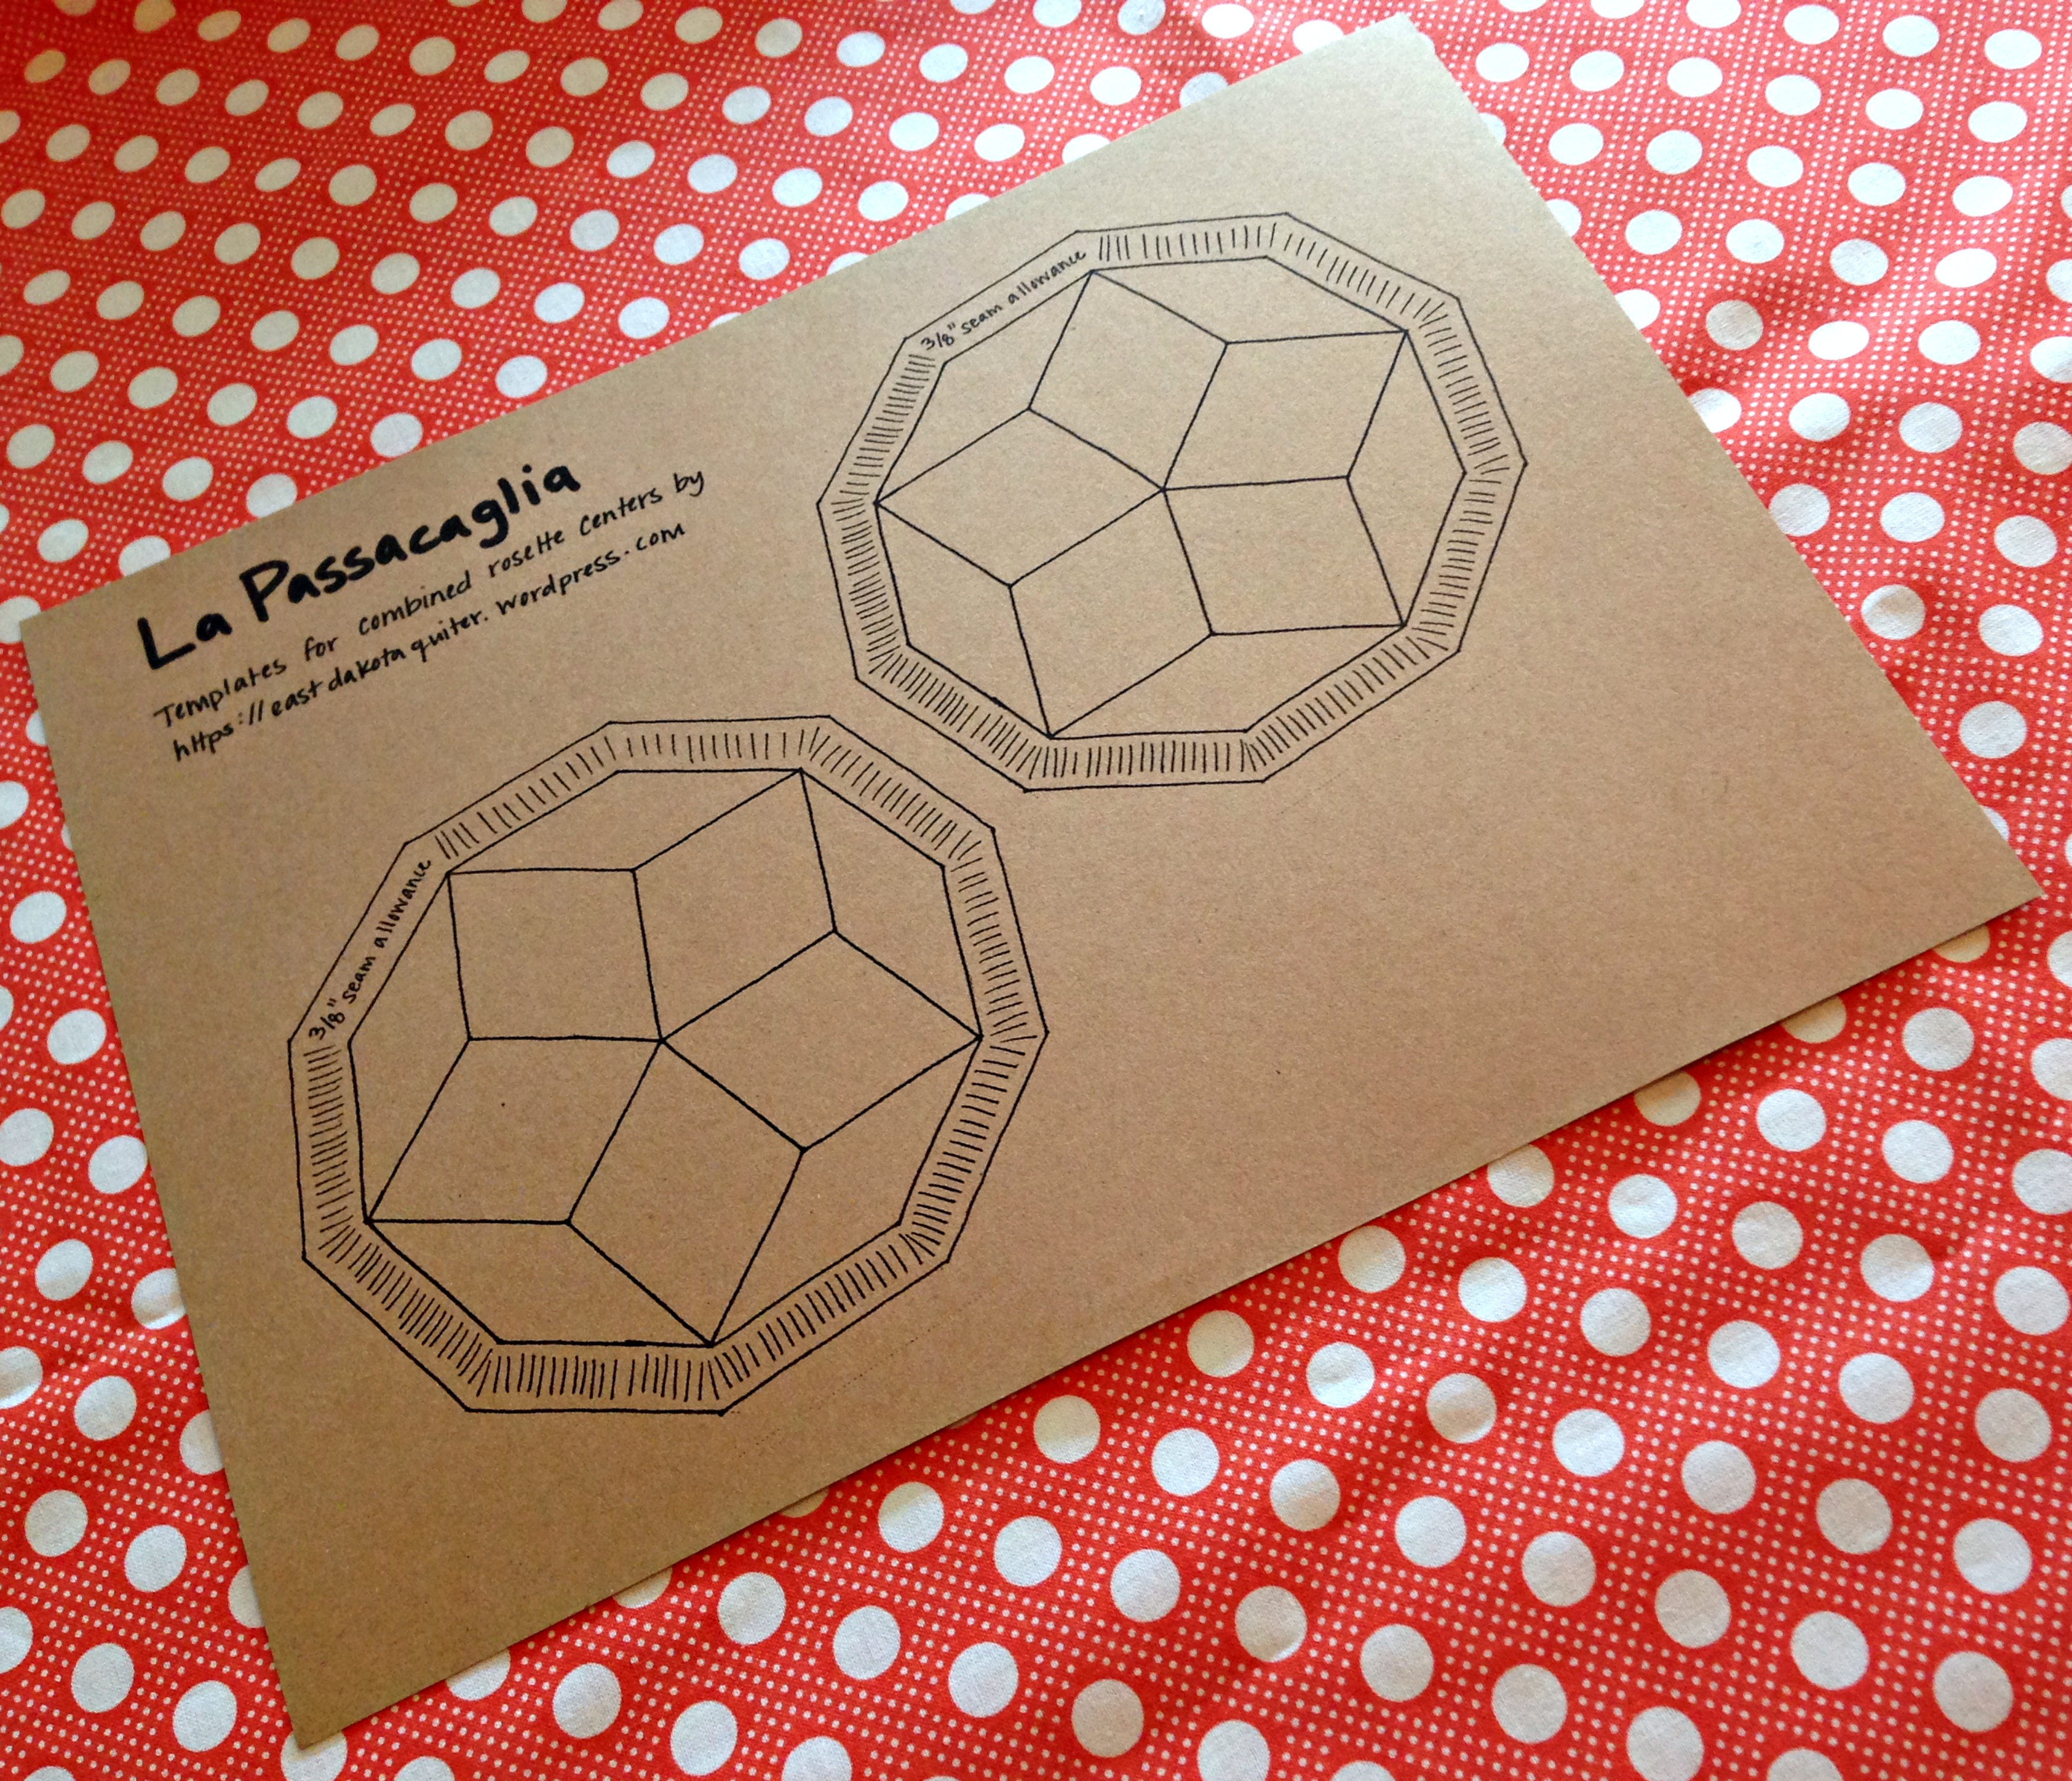
Passacaglia Center Template by East Dakota Quilter

First, I made a template of the rosette center. I think this is no major feat since anyone can line up a few diamond shapes, and it’s pretty obvious how they fit together if you’ve seen a photo of even a single rosette. The trick to La Passacaglia is how all the rosettes fit together. Definitely get the book if you want to make the quilt! After printing a template, I cut out the center of one of the images.

Cut Out Passacaglia Template Center by East Dakota Quilter

I lined up my fabric underneath the cut template.

Lining up Passacaglia Fabric under Template by East Dakota Quilter

Then I cut around the outer edge of the template to add 3/8″ seam allowance. Since the lines are traced by hand around the paper pieces, I used an acrylic ruler with my rotary cutter (for the outer edge) and Xacto knife (for the center piece). When you’re done cutting, you should have two pieces (one fabric, one template) like this:

Passacaglia Center Template by East Dakota Quilter

You could start basting your fabric to the center template at this point, but I wanted to glue mine in place for precision.

IMG_9487

Place your fabric wrong side up. Line up the seam allowance piece around the outer edges of your fabric.

Passacaglia Center by East Dakota Quilter

Place the center piece (with diamonds meeting in the middle) wrong side up. Glue the back of the center piece using either a fabric glue pen or a washable glue stick. Glue the center piece to the fabric (obviously glue side down), lining it up with the seam allowance piece. Then remove the seam allowance template and press.

Note on laser printers: Since laser printers use heat to bond ink to paper, running your iron over laser ink is like getting paper wet when it’s been written on with washable marker: the ink will smear. If you’re using a laser printer, I suggest placing a piece of scrap fabric over the template before pressing. Also, it’s best to press without steam since the humidity from steam will curl your paper.

Here’s the final piece held up to the light so you can see the seam allowance through the fabric:

Center Passacaglia Piece by East Dakota Quilter

One final note: I traced around each piece separately when making my template so I could use it as a single piece or remove any portion (e.g. removing one diamond to use a different fabric). However, it is much easier to baste convex corners (corners pointing outward) than concave corners (corners pointing inward), so keep that in mind if you remove a portion of the center template.

Check out my WIPs page for links to all my La Passacaglia posts.