Hooray! I am SO EXCITED to finally be finished with all four of the “big rosettes” in the La Passacaglia pattern – those with a double ring of stars. I’m happy with how the Liberty Tana Lawn Mabelle print in blue and red looks, too:
My overall progress looks something like this:
Yeah, I can’t believe I failed to blog about that little guy in the bottom middle, either. I guess I thought I must have done it when I posted to Instagram instead. Bonus rosette!
Now I’m trembling with naïve optimism that, with the most time-intensive rosettes finished, the rest of the pattern should practically sew itself and be finished in the next month or so – HA! Never mind it took me over two years to get to this point. And I will be having a baby in a month or two, depending when she decides to arrive.
Speaking of which… I have been disappointed when bloggers suddenly shift directions and turn a blog about home DIY into a blog about polar bears. Just for example. I didn’t want to do that with this blog, so feel free to check out the secondary blog I created, Building Home & Family, if you’re into home renovations and family life. We’re just starting both ventures, so I expect a lot more content should start flowing in future months!
Reader Question: Is there any interest in having my family-focused sewing projects appear here, too? Or are you more interested in quilts-and-only-quilts? Most blogs seldom receive much feedback anymore, so it’s difficult to anticipate what readers might want without going the ol’ trial and error route.
That said, there is one question that keeps popping up in relation to this blog, and I thought I’d answer it here for posterity:
Q: How do you create your “progress” images for the La Passacaglia?
A: It’s really time-intensive. Kind of like hand sewing the Passacaglia itself. But if you’re still interested, read on…
Step 1: I used the pattern image from the book and desaturated it (i.e. turned it from color to black and white). Don’t have the pattern? It’s in the Millefiori Quilts book, available here. (The vendor I used is sold out, but the linked Etsy shop owner is someone I met through the DCMQG when I lived out east, and she’s great.)
Step 2: I photograph my latest rosette finish, preferably against a neutral background to make editing easier.
Step 3: In Photoshop, I open the photo and delete/remove the background, including the extra “tails” on the triangles of the rosette to get a clean shape.
Step 4: Finally, I open the full pattern image, copy and paste my newest rosette, and resize/transform/rotate it until it covers the space allocated in the pattern. I aim for “pretty close” vs. perfect because even an overhead photo of a rosette tends to have at least a little bit of angle that makes the proportions a tiny bit wonky.
A few people have asked me to share some of the templates I’ve created for my personal use in designing my La Passacaglia, but I think it’s important not to violate the designer’s intellectual property rights. She worked hard on the design, folks! Given all the hours I’m putting into my quilt, I feel the cost of the book is probably the lowest per-hour book cost I’ve ever spent! And I DEVOUR books!
My progress on my La Passacaglia continues slowly. In the meantime, I finished some Christmas projects (in March!) and generally enjoyed a break from most sewing.
Since my last Passacaglia post, I’ve added two new rosettes, one large and one small. My original plan was to work on all the large rosettes first to have the best idea of what my finished quilt would look like. I have revised the heck out of that plan! The smaller rosettes are infinitely faster to finish, so I’m trying to pepper those in so I feel like I’ve at least made some progress! Here’s what I have so far:
My 3rd rosette was especially fun because it doubles as a quilt label. My new husband’s last name is Bayer, which he pronounces as “bear.” (I use two syllables.) I incorporated both Bayer and bears into the rosette. And a few hearts. ❤
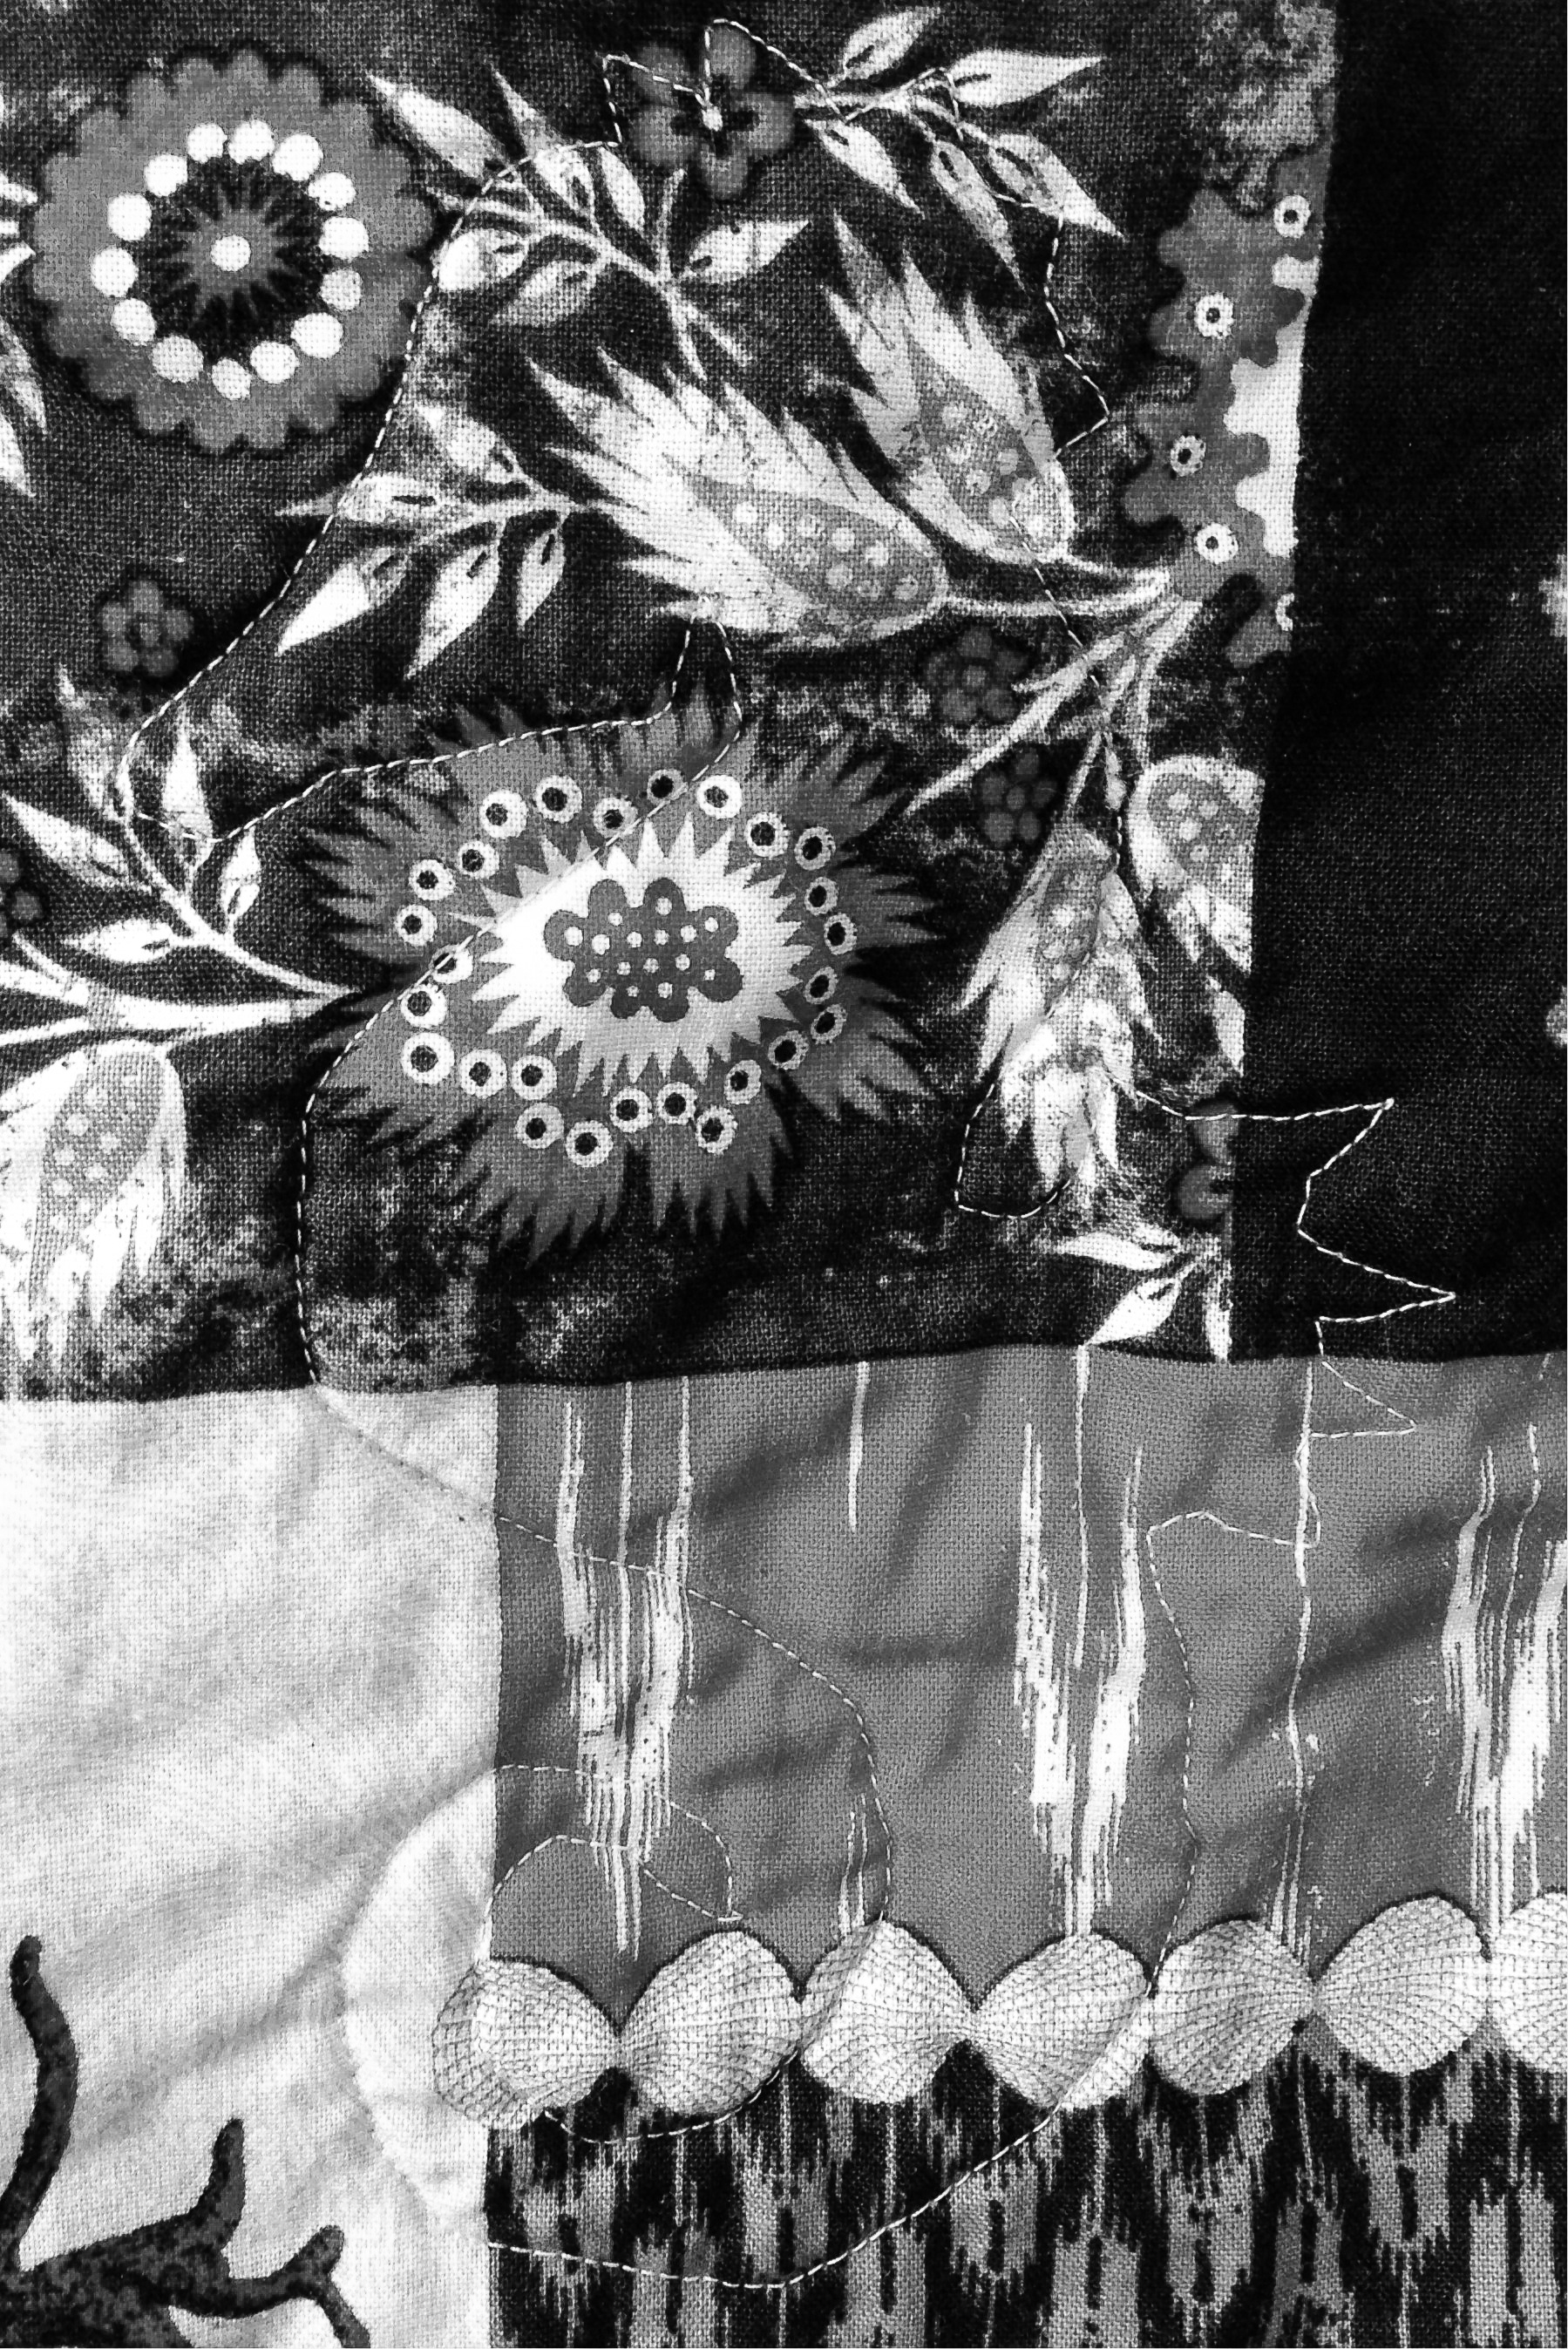
Here’s a closer view from a progress shot:
And this last rosette is the one I made after starting rosette #3 but before finishing it because it took FOREVER. (I mean every single one of those capital letters!)
As you can see, my blue-and-orange color scheme also incorporates some reds and yellows.
Early on, I made a coloring template for my Passacaglia in MS Word. I didn’t share it because I was concerned about copyright laws and didn’t want to steal the work of a designer. That said, the Passacaglia is everywhere, and others have made their coloring sheets publicly available. Theirs are also better than mine because all the shapes actually line up, haha. If you’re interested in a free La Passacaglia coloring sheet, I used the one I found here.
At a rate of about one rosette every two months, I’ve finally finished my second!
With saturated red-oranges, prints resembling snowflakes (at least if you squint), and wintery novelty prints (polar bears and Heather Ross/munki munki ice skaters), I call this my “fire and ice” rosette. I mentioned in earlier posts (here and here) that I plan to make my entire quilt in blues and oranges.
I know I also said this before, but the rosettes are HUGE! I took a photo with my feet for perspective.
Here’s a progress shot to show how I work. I got the hour basket as a swap gift for my birthday (#birthdayclubhandmade) and keep pretty much everything I need inside it so I can take it with me to the coffee shop on weekends.
Probably my rosettes would go a lot faster if I worked only on one at a time from start to finish. Instead, I usually finish the center of one, start basting (hand sewing), get bored, and sew another center or two in the meantime. I am currently started on three other rosettes.
One of my new rosettes will feature a single image in the center. Some quilters have done an incredible job of lining up individual pieces. I plan to shortcut the process and combine a few pieces at once. Here’s the process I’m using:
First, I made a template of the rosette center. I think this is no major feat since anyone can line up a few diamond shapes, and it’s pretty obvious how they fit together if you’ve seen a photo of even a single rosette. The trick to La Passacaglia is how all the rosettes fit together. Definitely get the book if you want to make the quilt! After printing a template, I cut out the center of one of the images.
I lined up my fabric underneath the cut template.
Then I cut around the outer edge of the template to add 3/8″ seam allowance. Since the lines are traced by hand around the paper pieces, I used an acrylic ruler with my rotary cutter (for the outer edge) and Xacto knife (for the center piece). When you’re done cutting, you should have two pieces (one fabric, one template) like this:
You could start basting your fabric to the center template at this point, but I wanted to glue mine in place for precision.
Place your fabric wrong side up. Line up the seam allowance piece around the outer edges of your fabric.
Place the center piece (with diamonds meeting in the middle) wrong side up. Glue the back of the center piece using either a fabric glue pen or a washable glue stick. Glue the center piece to the fabric (obviously glue side down), lining it up with the seam allowance piece. Then remove the seam allowance template and press.
Note on laser printers: Since laser printers use heat to bond ink to paper, running your iron over laser ink is like getting paper wet when it’s been written on with washable marker: the ink will smear. If you’re using a laser printer, I suggest placing a piece of scrap fabric over the template before pressing. Also, it’s best to press without steam since the humidity from steam will curl your paper.
Here’s the final piece held up to the light so you can see the seam allowance through the fabric:
One final note: I traced around each piece separately when making my template so I could use it as a single piece or remove any portion (e.g. removing one diamond to use a different fabric). However, it is much easier to baste convex corners (corners pointing outward) than concave corners (corners pointing inward), so keep that in mind if you remove a portion of the center template.
The subject phrase prompted dear old Mom to prohibit my sister and me from saying the color “pink” for a week. (A quick successor of “Blue, blue… you too!” caused her to proclaim that ALL colors were banned UNTIL FURTHER NOTICE! Oops.)
To be honest, my feelings about the color pink at the time were about the same as my feelings about my younger sister (whom I now love dearly): I loathed them both. And the reasons were the same: over-saturation. I spent all my free time with my sister. And my bedroom, decorated by my mom, was entirely pink and white! I am more of a “can we keep adding more colors until we puke?” kind of person. (Hence, my first attempt at quilting is known as the Ugly Quilt, which used an unrestrained palette.) I have since been sympathetic to the plight of baby girls everywhere–that urge for parents and friends to swath little girls in the color pink, whether for love of the color or simply to avoid having to tell the millionth well-wisher, “My baby is a GIRL. SHE is one month old.”
All that said, I want to like the color pink. I want the freedom to reach for it to balance out other colors in my quilts. I want to be able to incorporate a novelty print that uses pink as its background. So I decided to push myself. Some of our closest friends are expecting a baby girl in a few months. I wanted to see whether I could use the color pink in a quilt I didn’t hate. And I succeeded! The palette is actually pink and blue, but I think it’s still clear that the quilt is for a girl.
The Swoon quilt block pattern by Thimble Blossoms is available here in a variety of sizes. I also have the mini version. It was really simple to sew. I was impressed that even when I wasn’t taking my time, everything seemed to line up just fine! Great pattern.
Since the couple lives in NYC, I also wanted to incorporate the place of the baby’s birth. The backing fabric is Great Gotham by Samarra Khaja and depicts the five boroughs. Isn’t it adorable?! It’s out of print, so snag some if you see it!
One final note: I used the quilting bar on my new Janome machine, plus the Accufeed quilting foot. WHOA. I always wondered how quilters got such perfect rows and even stitching. Yes, it’s possible to replicate these things on a less advanced machine, but it is WAY easier and looks WAY more professional if you have the right tool for the job! I’m still so thankful for my awesome machine. It sews like a dream. AND IT’s NOT PINK, haha.
I mentioned in my QuiltCon blog post that I intend to begin a La Passacaglia quilt. Naturally, I’ve begun with more research than can help me actually do the work and make the quilt. I thought I’d summarize some things for anyone else who wants to do this project because it is blowing up all over the interwebs!
THE BOOK THAT STARTED THE CRAZE
First, we’re talking about the La Passacaglia Quilt pattern from the book Millefiori Quilts, which features 19 of Willyne Hammerstein’s quilts.
All that Italian actually does a great job of describing the style: millefiori is a combination of the words “mille” (thousand) and “fiori” (flowers). Certainly the concept of a thousand flowers applies to the La Passacaglia, which has many rosettes/flowers making up the quilt. Passacaglia comes from the Spanish “pasar” (to walk) and “calle” (street). Think walking or dancing down the street—perfectly appropriate if you imagine winding, cobbled lanes and compare that against the many curves in the quilt.
Instructions in Millefiori Quilts are for machine piecing the quilts. However, if you’ve ever done a Y-seam, you can understand why a majority of people are choosing the English Paper Piecing (EPP) method instead.
I bought ALL THE THINGS to start this project from paperpieces.com. (UPDATE 2017: Since the link from paperpieces is no longer working, Karen of the DIY Addict was kind enough to send me a link to her site, where you can still buy the supplies!)
Items include the book, acrylic templates, and all the paper pieces necessary to make the quilt. I might have bought a smaller set of papers if I had it to do over again since you can just reuse them, but it’s nice not to have to. Between these items and the fabric, it’s probably going to be the most expensive quilt I’ll make… but have you seen how awesome it looks?! I’ve also seen acrylics on Etsy that have holes at the intersection of each seam allowance in case you want to machine piece and mark your Y-seams. LA PASSACAGLIA INFORMATION
The La Passacaglia Quilt includes approximately 2900 pieces in five different shapes/sizes as follows:
Piece A (1¼” diamonds for 5-pointed stars): 468 Pieces
Piece B (1¼” diamonds for 10-pointed stars): 206 Pieces
Piece C (1¼” pentagons): 640 Pieces
Piece D (¾” pentagons): 272 Pieces
Piece E (1¼” isosceles triangles): 1368 Pieces
This info comes from the number of pieces in paper piecing packs, rather than the pattern itself. I was surprised not to see any hexagons and also that there were only five shapes for the entire, very busy quilt top.
EPP GENERAL INFORMATION
Cutting the Fabric
Standard EPP protocol is to add 3/8” of fabric around each side. Common alternatives are ¼” or ½”. Acrylic templates are available in each of these size preferences.
Measuring the Pieces
In EPP, most pieces are the same measurement along all sides. (An exception from the pieces above is the isoscolese triangle, which is equal on the two long sides but has a shorter “bottom” that matches the length of the pentagon sides.) EPP pieces are measured along one of the equal sides.
Basting Each Piece
There are several methods of basting EPP pieces.
One method is to sew around the shape. Even this has several different versions. In one version, you just tack the fabric along each corner of the piece. In another, you weave your thread along the length of fabric between each corner. I plan to do the first of these since that’s the method I learned in my EPP workshop with Katy Jones of imagingermonkey. And it’s faster and doesn’t mean ripping any paper at the end of the project.
Another method is to glue baste. Some glue pens are specifically made for gluing fabric; I have the Fons & Porter version. I’ve also read that a plain, washable glue stick works well. (It worked great when I glue basted a zipper on this bag.) I have been gluing some of the fussy cut fabric pieces lightly to the papers to keep them from shifting while I hand baste around the edges. It’s been working pretty great. So far, I’ve only used the glue pen, but I’ll likely switch to the Elmer’s when that runs out.
Creating Patterns from Fabric (and being consistent)
Solids are a great choice for EPP. However, one reason I’m excited about this project is a chance to make repeatable patterns from fabrics. I’ve mentioned BEFORE that while I like the look of a repeatable pattern across an entire quilt, I deplore the monotony of chain piecing. Now is my chance to let precision shine! By “fussy cutting” fabrics, you can highlight a portion of the design. It works great with florals/swirls. I’m also thinking about including a few Heather Ross novelty prints. If you don’t know where to start, Google Amy Butler, Tula Pink, and Anna Maria Horner prints to see fabrics with repeatable patterns.
The tricky part about fussy cutting is ensuring all the pieces are consistent. Florence of Flossie Teacakes had the genius idea to make her own plastic templates and draw with pencil the outline of her repeating fabric pieces. Modifying this concept, I have been using erasable marker on the acrylic templates I purchased. It is working great and wiping off cleanly.
Selecting the Right Thread
For the back of your EPP, you can use any thread you want. I still use Aurifil brand thread for this because it doesn’t break or tangle as easily as other threads, but since you aren’t relying on it to hold long-term, you can use anything that will last until you stitch your pieces together.
For stitching pieces together, some threads are less visible than others, so you can decide how “handmade” you want your EPP to look. A woman in my EPP workshop said she swears by silk thread for connecting pieces. Florence blogged about a polyester thread (Superior Threads brand, Bottom Line type – bought mine here) that piqued my interest.
I can’t tell whether I like it. I admit the end result is much prettier/less visible stitching, but the thread is kind of “bouncy” to sew with. When I pull the thread tight at the end of each stitch, it’s kind of like a bungee cord; it stretches longer than it seems it should, then bounces back to a resting position. So it feels weird to sew with but looks fantastic! I think I will continue to use it. I hope it’s durable when I’m putting so much time into one project! I’ll post photos of my first Passacaglia rosette when it’s finished so you can compare.
RESOURCES
Other bloggers who have written about the La Passacaglia quilt that I found inspirational (obviously not an exhaustive list) include:
You can see about a million more great passacaglia photos on Instagram. Check out:
tulapink (especially the behind the scenes in Artists & Makers magazine; you can see her Passacaglia in the background), lilabellelane, carriestraka, alexouq, kamiemurdock or hashtags #lapassacaglia and #passacagliaquilt
I plan to make my La Passacaglia in blue and orange. It’s my favorite combination, and I found a crazy amount of inspiration from @elisabew’s Farmer’s Wife and blue & orange Marcelle Medallion quilts. I’m concerned the cogs might flow together a little bit, but Pinterest user Quilt Passion (Åsa Holmér) did a good job of distinguishing hers using only a blue and white palette. My quilt will have blue and orange AND white, so with a whole extra color, I should be fine… right?!
Well, I think that about covers EPP generally and La Passacaglia more specifically. There’s nothing left but to dive in. Which is exciting… but also a little unfortunate since the planning/research is my favorite part, aside from having a finished quilt to show off. Since it’s going to take me forever, I have a WIPs page (tab at the top of the blog) available so it is easy to track my progress on this and a few other long-term projects.
Disclaimer: This is going to be a LONG post. I have a few goals:
First, I want to share photos for anyone who wasn’t able to attend QuiltCon this year.
Second, I had a lot of questions about what to expect for my first-ever QuiltCon experience, so I want to share tips for future attendees.
Third, I bought a Janome machine at QuiltCon and thought it might be helpful for others to know how the negotiation process worked. (Spoiler: I paid the price they asked, but it was way below retail.)
Awhile back, I noted I was in the market for a new sewing machine. Fellow members of the DCMQG told me I should consider buying my next machine at a show, that their purchases were made significantly below retail value. That decided it for me: I would use my anticipated savings to attend QuiltCon. It was a bit of a gamble, but it totally paid off! And I had the best time.
Before I go any further, let’s look at some of the awesome quilts in the show. I obviously didn’t photograph them all, but here were some that caught my eye:
The quilts above are: (1) [The American Context #16] Christina’s World by Luke Haynes, (2) Holy Sh*t, Sherlock by Kristy Daum, (3) Woodcut by Holly DeGroot, (4) Wavelength by Lee Heinrich, and (5) Huckleberry by Bryan House Quilts.
A few of the quilts begged for a close-up.
Above is [The American Context #68] Double Elvis by Luke Haynes. I’d always wondered what his appliqué looked like up close!
(A) Bauble by Emily Cier, quilted by Angela Walters; (B) Geometric Rainbow by Nicole Daksiewicz; and (C) Eggs and Darts by Amanda Leins, pieced by Susan Bishop.
The next four quilts have unknown makers but are all from the collection of Bill Volckening:
Okay, now where to begin with my experience? I got into Austin, Texas, late Friday night, arriving around 1am.
Pro tip: I didn’t have extra vacation time, but if you can swing it, I definitely recommend arriving at the start of the show. I missed the Moda Party, some of the Cotton + Steel fabric I had hoped to buy was sold out, I missed some of the workshops/lectures I would have found most interesting, and I missed certain other promotions. It wasn’t the end of the world, but I think the extra few days would have been worthwhile.
Registration on Saturday started at 8am. The process was professional and easy. I scanned my barcode (received in an email and printed out at home), although you can also search by name. Then my official nametag was printed, and I received a sweet swag bag.
Pro tip: Each nametag has a barcode that is used to scan the attendee into sessions (s)he has registered for.
I showed up promptly at 8am. There was no line. I was finished in less than 3 minutes. My workshop didn’t start until 9am, and the exhibition hall didn’t open until 10am, so I went to check out the contents of my swag bag, review my schedule, and get a coffee. Here’s a photo of some of the contents of the swag bag (charm packs of fabric didn’t fit into the photo):
My first workshop was English Paper Piecing with Katy Jones (on Instagram as @imagingermonkey… but you already knew that!). I thought the session was great. She picked a project with enough different shapes so skills will translate to other projects. There was fairly minimal instruction. She showed us how to do each shape the first time, then let us make repeat pieces. Once we’d worked for awhile, she showed us how to connect the pieces. The cool thing about the class was having someone check our work and give one-on-one feedback (increase stitch length, don’t pull so tight, etc.). The class size was less than 30 people, so we all had the opportunity to ask questions. As Katy joked, I feel confident in my new English Paper Piecing skills because I learned them from someone English!
Pro tip: Full-day sessions have a two-hour lunch break from 12pm-2pm. Vendors are in their booths during this time, and the quilt show is open. There are also some demonstrations that are open to all attendees.
The workshop was scheduled from 9a-5p. Honestly, I wasn’t sure how I would do handwork for that long without getting squirmy. I needn’t have worried. First, there was a lunch break. (This also answered for me when I would contact a sewing machine sales rep about getting a good deal.) Second, Katy said she would buy a drink for anyone who made it even halfway through the project; she didn’t think it was possible. I’m hugely competitive, so that was all I needed to hear. I worked like a madwoman. I got close but didn’t make it. Here we are with the work I completed in class:
(Dunno why my face was flushed like I just ran up the stairs to the top of the Empire State Building, but a little B&W adjustment fixed that!)
Katy teased me about the template I made with Microsoft Word and brought to class. But I know it made me cool, haha.
During class, I learned that Katy’s magazine, QuiltNow, is finally being sold at Barnes & Noble in the U.S. I haven’t seen it in stores yet, so I’m really excited to get my hands on a copy!
I had my sights set on a Janome Horizon Memory Craft 8900 and told my fellow EPP classmates while we stitched away. They had excellent news! A Janome rep visited all the workshops a day or two before I arrived and said the 8900 was the machine being used at the show. Attendees could get a machine (used in workshops for the 4 days of QuiltCon) at an extremely reduced rate. The only “catch” was that only a limited number of machines were available.
If you think talking about money is gauche, please skip the next paragraph. However, it’s difficult to find sewing machine prices online, you don’t always have a ton of local vendors to be able to shop around, and so I appreciated reading past bloggers’ experiences. I want to share mine in case it helps someone else.
I already knew the Manufacturer Suggested Retail Price (MSRP) had gone down $1,000-2,000 to $4,000 recently. Other bloggers mentioned getting their machines at a show for $2,500 or $2,300. I was hoping for a rate like that. Instead, I got my machine even less expensively… for just under $1,900!!! The rate included shipping to my house and was either inclusive of taxes or not subject to taxes (because Texas).
After the show, all the machines are going back to the local rep’s warehouse, and they’ll ship from there within the week. I also bought a table to go with the machine. They’re not sold by the same company, and the tables ordered for QuiltCon didn’t arrive in time, so that will ship approximately 3-4 weeks from now. I’m sure the rate was somewhat reduced, but nothing near the 50% discount on the machine!
The machine-buying experience, which I’d planned to span the 2-hour lunch break, was complete in less than 15 minutes. (When I asked the rep whether it was the fastest sale he’d made, he responded with a curt, “No.”) I have to admit that, as awesome as QuiltCon was, the next few hours were a tiny bit anti-climactic after the awesomeness of buying a machine. For hundreds less than anticipated. With a table into the bargain.
QuiltCon was surprisingly smaller than some of the other shows I’ve attended (blogged here and here). That said, I felt the vendors present were more targeted to the type of quilting I enjoy, so the smaller size wasn’t at all a detriment. (Example: I’m not the biggest fan of batiks, so it was nice to have one or two batik vendors instead of having to navigate between what seemed, at other shows, like a million of them.)
One of the most-photographed booths at QuiltCon had to be Cotton + Steel. It was divided into sections. To the far left was the Tinsel line and a mock fireplace. To the right of that was a sewing station. You could pick through boxes of C+S “scraps” (some of which were bigger than FQs) to make either a pincushion or a headband. To the right of that were the apparel fabrics. And on the far right was a temporary tattoo booth and the B&W prints, many of which were part of a Halloween theme.
I was most excited about the Tinsel and Black & White lines of fabric when I arrived, but Melody Miller personally pointed out to me some new rayon fabric that will make great apparel (it felt amazing and draped beautifully), so now I’m equally excited about those. This also comprised my most embarrassing “sewlebrity” experience. I got completely tongue-tied. I think all I told her about the rayon was, “This is great.” Then I went and stood in line for a temporary tattoo—not because I was disinterested in the fabric or talking with Melody Miller, but because I knew I couldn’t be counted on to say anything more intelligent than that! Talking with Sarah Watts about a temporary tattoo was easier because at least there was a clear course for the discussion – “I like this tattoo best. Here’s my left arm. Thank you.” Haha. I did stick around long enough to learn that B&W comes out in April, other lines in May, and Tinsel in July.
Pro tip: You will get to see a lot of the new fabric lines at QuiltCon, but you won’t actually be able to buy them yet. Manufacturers make display items from the strike-offs to show their lines before all 3,000+ yards are printed and available to the public.
All the C+S girls were friendly and gracious. One of the cutest QuiltCon moments for me was watching them help some up-and-coming quilters sew their projects at the sewing station in the booth. Here are Alexia and Melody helping:
Alexia also took a photo with me. I am so excited!!! You might recall that I sewed her Marcelle Medallion pattern awhile ago. It is still my favorite quilt pattern.
I was also really excited to see a photo of my Pixelated Panda quilt on display in the YouPatch booth. Andi was kind enough to take a photo with me and a photo of the quilt:
In terms of other booths, there was great fabric from all the vendors, but I think the one with the widest selection on the bolt and therefore the longest lines was Island Quilter. Many of the other vendors focused more on half yards or FQs. It makes sense: pre-cut fabric is way easier to transport. It was also a nice way to get a wide vareity of fabrics.
Kona Cotton’s booth had a popular game where you could try to name 30 preselected fabric colors in 2 minutes. After your guesses, you could spin a wheel to win a pin, a FQ, or a color card. (I got a pin.) Elisabeth Woo was the rep by the color cards when I was there, and I had another sewlebrity blank-out moment. I’m blaming this on the adrenaline crash after buying my new sewing machine for such a fantastic value!
Pro tip: Check in advance which booths are manufacturers versus retailers if you’re looking to buy something specific. Aurifil’s booth was right next to the Kona prize wheel. They had a lovely display, hosted a game with prizes, and, as sponsors, provided nice things in the swag bag, but I was surprised you couldn’t buy vast quantities of Aurifil thread on-site at the Aurifil booth. Similarly, you couldn’t buy C+S fabric at the C+S booth. Both were sold at the booths of their retailers. However, they were great about directing you to the appropriate booths.
After my EPP class, I also attended the keynote by the quilters of Gee’s Bend. It wasn’t at all what I expected! Instead of talking exclusively about technique, they also talked about their experiences growing up and sang songs, my favorite of which was, “Swing Low, Sweet Chariot.” Mary Ann Pettway is the head of the group. She said she works on many projects at once. If someone wants to buy a quilt of hers, she says, “Go ahead and pick out your favorite of my WIPs. If you can wait 2 years, I’ll get around to it!” Haha. The next day, I ran into her on the floor of the quilt show, and she took a picture with me!
The coolest part was that she wanted to show us the label on the back of her quilt. As attendees, we obviously aren’t supposed to touch the quilts, but she pulled up a corner to our audible gasps. She said, “It’s my quilt! I suppose I can touch it.” She was friendly and so funny!
After the keynote, I went out to explore Austin, settling on Stubb’s BBQ for dinner. I think moving QuiltCon to other cities is a nice idea (the next event is in Pasadena, and the one after that is in Savannah) so more people can attend locally, but am sad that not everyone will experience Austin. It didn’t feel like other Texas cities where I’ve spent significant time (Houston, San Antonio, Dallas). I think a whole blog could be—and probably is—dedicated just to the facial hair of Austin. Ginormous beards were the norm. I saw some interesting variations, too. One guy dreadlocked his beard and tied up the strands at the top of his head. Another had a waxed moustache that stuck out at least 3 inches past his face on each side. (He also wore a top hat.) Studded jackets and military gear were everywhere. I noticed that although some of the style is “tough,” the people I talked with were universally friendly. I loved that.
I was back to my hotel around 8.30pm. Probably I should have gone out with other attendees, but I was exhausted! It was weird. I know I got in late the night before, but I spent almost the whole day sitting in one spot, working on EPP. That’s not exactly exhausting work! However, I noticed the same thing the following day: being bone-tired as soon as the events were finished for the day.
Pro tip: For this reason, I suggest traveling with or meeting a specific friend so you are forced to make the most of your time. I didn’t fight it and instead got halfway through my EPP project by staying in.
The next day, I already knew that the vendor hall/quilt show wouldn’t open before my workshop, so I got a later start. My class was Compositional Drawing with Krista Withers (on Instagram @lolablueocean). It was fantastic!
My current Singer machine is great for piecing but is a total pain for quilting. It is difficult to get the tension even on both sides, so I’ve been resigned to straight line quilting, and even that has unfortunate puckering for any crossed lines. There’s also no speed control, and the foot pedal sometimes stalls, then drives about 100mph. Needless to say, I am SO excited about getting a new machine, and this class was perfect for helping me know where to start with quilting.
Krista’s method (which I won’t describe in detail since it’s not mine to share) involves breaking the quilt into sections and then quilting those sections across the quilt. It’s weird, but I actually felt a sense of relief in the class, like, “Wow, I’m not going to have to figure this out on my own once my machine arrives.” Watching her do her thing was my favorite part of the class.
She assured us we can develop muscle memory in quilting. I hope to goodness that’s true. I need the help. Since my flight was canceled in the middle of class, I spent a lot of time on phone with the airline and skipped using my ruler for most of the session to save on time. My test piece is UGLY as a result. Seriously. Still, I got great ideas to bring home. We also got some plastic to practice with in the course kit, so I will be drawing on the plastic (set on top of the fabric) over and over before my new machine arrives!
At the end of class, Krista also agreed to take a photo with me.
My afternoon lecture on Sunday was the time slot I was most excited about. I attended Heather Ross’ discussion about what she’s learned over 20 years of designing fabric. I don’t plan to start a line or anything, but I am a huge Heather Ross fan (not just the fabric; her books are SO worth reading!) and found that most of the concepts she discussed apply equally well to creative ventures more broadly. I am impressed any time a speaker can have a “conversation” in a huge room with an audience. It felt a lot more intimate than it was—although it was a smaller session than I’d expected. Heather’s lecture was funny, heartfelt, informative.
Pro tip: The show is WAY emptier the last afternoon as everyone heads for the airport. If the stuff you want to buy isn’t sold out, it’s a much quieter time to make purchases.
After the lecture, I went to her book signing at the Stitch Lab booth. I’m on my fourth copy of How to Catch a Frog since I keep recommending and lending it to people. I would buy the book twice as many times again… although I won’t be lending out this copy:
My favorite essay in the book is about the Polar Bear Plunge. Her husband is the hero of the story, and I read it while wedding planning, so it stuck with me in a big and happy way. Of course, when she asked if there was anything in particular I would like her to draw, I realize in hindsight that a strawberry or cat or flower or frog or ANYTHING featured in her fabric lines might have been a more obvious choice. But I just love this book and the sketch! After my book was signed and I was already walking away with a big dumb grin on my face, she asked, “Do you want a picture?” “Um… YES!”
The best part about the book signing was obviously the book signing experience itself. But the next best thing was seeing who else was in the line with me. It was almost like scrolling through my Instagram feed of all-stars!
Heather’s new collection is called Tiger Lily by Windham Fabrics. She said it should be in stores in July. A FQ bundle arrived at the Windham booth just before her lecture, and I stopped by to see it after the book signing:
It was still wrapped with a bow when I saw it, but check the Instagram feed of @emmylizzy to see it spread out. You can at least see the colors in this photo. We also got to see a few sneak peaks during the lecture, and I’m really excited about the Climbing Trees print. Heather said it was one of the more difficult prints to design since it includes lines (vertical lines of tree trunks). It’s hard to see much of it as just one FQ (guess I’ll just have to buy some yardage!), but it looks incredible! Many thanks to Windham for the charm packs of Far, Far Away from when I stopped to coo over Tiger Lily.
And with that, QuiltCon was over. My flight situation didn’t really resolve itself. Due to weather, I was delayed a day. The silver lining is that late last night, I finished my EPP project! Hooray for one less WIP! I still have to make it into a cushion/pillow cover and quilt it with some contrasting thread, but it was fun.
Now I’m thinking about starting a La Passacaglia quilt. Sewing all 2900 pieces by hand. Because I’m insane. I may have already invested a small fortune on the pattern… although, compared with competitors’ prices, my purchase at Paper Pieces was reasonable. I even got 20% off by Googling a discount code – EPPFB. Until Paper Pieces bought 200 copies of the book, it was difficult to get in the U.S. So I’d rather have the option to spend a lot of money to get the stuff I want than not have that option. Besides, my husband is perfectly content with ramen noodle dinners, haha.
Katy mentioned La Passacaglia as the ultimate EPP project in her class, and Jenny Fox-Proverbs from Love Patchwork & Quilting magazine, in conjunction with the C+S team, gave a demonstration of how awesome each cog of the quilt can look.
As many photos as I’ve included in this post, there are so many moments I didn’t photograph. I saw a ton of designers (of fabric, quilt patterns, and otherwise) I admire. I didn’t go out of my way to run into them. In fact, like I said above, I was so tongue-tied that I needlessly avoided some. But just to give you an idea of the awesomeness of QuiltCon, I saw the following people with my own two eyes: Katy Jones, Krista Withers, Katy Jones, Alison Glass, Nydia Kehnle, Tula Pink, Alexia Abegg, Melody Miller, Sarah Watts, Rashida Coleman-Hale, Kimberly Kight, Denise von Minden, Holly DeGroot (@bijoulovely), Heather Jones, Alex Veronelli, Gemma Jackson (@prettybobbins), Jen (from Love Patchwork & Quilting magazine), the quilters of Gee’s Bend, Lizzy House, Sherri Lynn Wood, Kristi McDonough (@schnitzelandboo), Cat (@hellofromcat of Cat and Vee), Elisabeth Woo, Matt Wheeler, Andi (from YouPatch). I’m sure there are more I can’t remember at the moment; my method of listing them was a casual scroll through my IG feed. I might be bragging, but that’s not my intent. What I really want to illustrate is just how accessible the entire quilting community is at QuiltCon! It was amazing!
I blogged about the QuiltCon registration process here. I hope to review my new machine soon. If you have other questions, I’ll be happy to try to answer them in the comments section. I’m not sure I’ll ever be lucky enough to attend another QuiltCon (I did just spend a bunch of money on a new machine, after all), but this was a really great experience. Thanks to the MQG for putting it together!
I used an amazing program to plan this quilt, but let’s start with the background story.
Some friends of ours are about to have a baby girl. The mom-to-be loves pandas and watched baby Bao Bao on the National Zoo’s Giant Panda Cam almost every day when it first came out. The dad loves computers. To marry the two interests, I thought a pixelated panda quilt would be perfect!
I didn’t want to make the quilt too girlie, so pink on the front side of the quilt is relegated to binding.
On the back? More pink… and a lot more pandas!
For once, I even remembered to include care instructions and a gift tag (back side, not pictured). I kind of hate making labels and I’m not really sure why.
I pretty well destroyed our apartment while I was working on this one. There were various-sized pieces that covered our kitchen table. Each time I finished a block, I washi taped it to the wall. I had little sections ALL OVER the apartment.
I think the finished quilt was worth the mess!
While I still hate chain piecing, the program I used made it as painless as possible. Does anyone here remember the tutorial I wrote about how to turn a photo into a pixelated quilt? I really enjoyed the manual process and it’s FREE… but you guys, I don’t think I’d ever do it again. The year after I published my tutorial, a husband and wife team developed a website called YouPatch that does the pixelation for you. Maybe you’ve heard of it. I’ve seen other bloggers write about it, but after trying it for myself, I wanted to tell the whole world how amazing it is! They’re not paying me to write this. Their website is just AWESOME.
For a reasonable price (less than $10 for the quilt I made), here’s the process:
1. Upload the photo you want to turn into a quilt. I used a photo of a panda, removing the background. Eliminating the background makes the main subject of the photo really stand out. I was also pleased that YouPatch did a great job with my poor quality photo!
Once the photo is uploaded into YouPatch, you decide whether you want the orientation of your quilt to be portrait, landscape, or square. I picked portrait.
2. Pick how many fabric colors you want to use. I chose 8 for my quilt. The current maximum number is 15. The higher the number, the more detail in your quilt… and also the more work you have to do. You get to preview the difference for each option, which is insanely cool. I would have been happy with fewer options, but I really liked the control this gave me.
3. Pick a finished quilt size. Why? you might ask. Can’t I just use the grid of pieces the software generates to do my own sizing? Well, yes. But a few things: (a) you’re crazy if you want to do quilty maths that the program would do for you; and (b) based on the size you select, the program will tell you how much fabric to buy!
4. Change out colors if you want. My quilt was grayscale. You could do crazy-different colors (a pop of lime on plum), or you could do a quilt using the same concept as grayscale (light to dark) using a specific color like blue. (I bought my Kona solids on fabric.com. They were out of Kona Silver, so I substituted Kona Shadow.)
You also have the option to manually change a pixel, which is cool. If I hadn’t deleted the background on my photo before uploading it, I would have used this feature to manually remove any distracting details.
Then you just pay for the pattern (less than $10 for me), and they email it in pdf format. Mine was very detailed, with 17 pages of instructions, illustrations, and ideas. I didn’t need all the provided info, but it was nice to gauge whether I was on the right track at times.
I wondered was whether each pixel would be an individual, standard-sized square or whether YouPatch would group side-by-side pixels of the same color. Probably I could have researched this in advance, but I didn’t. They do #2 (grouping). I love this. The pattern tells you what size blocks to cut. Due to grouping, not all pieces are the same size. I received another email when I was about halfway through sewing this quilt that said the grouping has been even further improved. There’s definitely a balance between grouping as many pieces as possible so there is less sewing and trying to ensure the pieces can be assembled into standard-sized blocks that don’t require you to read a complicated “map.” I did some minor adjusting on my own but would be interested to see the changes.
The pattern also gives you layout ideas for each fabric color to ensure all your blocks can be cut from the amount of fabric recommended.
Once your pieces are cut, the pattern the shows you how to assemble the pieces into equal-sized blocks. Put the squares together and voila! Finished quilt!
There are plenty of instructions if you’re new to quilting. I got by using only the grid (pieces to blocks assembly) because it was clear on its own. Yay for feeling like a pro!
The customer service was great, too. I actually received a follow-up email about an hour after I received my pdf pattern that contained some suggestions and even a second pattern choice. If I hadn’t already decided to review YouPatch, this would have been the clincher.
Yes, I elected to sew way too many pieces on a deadline, but I loved using YouPatch and I really like the finished quilt. If you’re thinking of trying it, I can definitely say I recommend the YouPatch program.
When there is good news and bad news, I like to get the bad news out of the way first. The bad news is two-fold: (1) the photo I took was a nighttime shot that doesn’t make the project look great but does a FANTASTIC job of capturing the threads on my couch, and (2) this pillow cover was meant to be a decoration for the holidays last year.
But I think the good news outweighs the bad by far this time. This is my first-ever Dresden block, and it worked great (once I took out one of the pieces)! It was finished well in advance of Christmas this year… which means I got to put out one decoration in advance of my husband’s strict day-after-Thanksgiving rule. I’m such a cheater! And I no longer have a WIP mocking me from atop my scrap fabric cart. Or at least there is one less of them. Plus, this project was a great scrap buster for all my leftover red, green, and Christmas fabrics. Success!
In the spirit of finishes, I also made the unicorn herringbone skirt I mentioned in an earlier post. It fit okay, which was a small miracle considering all the changes I made to the pattern without knowing the first thing about sewing or designing clothes. There was enough room for improvement that, although I wore the skirt to work one day, I don’t think I’m quite ready to post it here. Stay tuned, though. I’m sure to have a more promising clothing finish soon!
I may have mentioned that I loved our wedding photographer. She had a ton of energy, an eye for detail (“Here, let me just move these leaves on the ground so I don’t have to edit them in PhotoShop later.”), and was so certain about what she was doing that she could get great photos of the guys in just a few minutes. They all came to tell me afterward how awesome it was not to stand there for hours. I got to peek at her camera screen a few times, and let me tell you, I cannot WAIT to see the final photos!
In the meantime, I’ve been in a secret race with her. I made her a baby blanket. (Yep, she did all that great work while visibly pregnant!) I wanted to finish it and send it to her before the wedding photos were ready so it wouldn’t look like a quid pro quo, thank-you-very-much-for-the-photos-here’s-your-reward. Mission accomplished! She received the package today.
I went with an underwater theme. (Border and backing fabrics are from City Quilter in NYC. I am definitely going back there.)
The back:
The low volume squares between the boats are quilted with outlines of different oceanic creatures/items, including a scuba diver, a crab, a pelican, a dolphin, a fish, a whale, an anchor, a conch, a mermaid, an octopus…
…and a seahorse.
It was great practice with the curvy shapes that are so popular right now in the quilting world. And although I need to learn how to bury my quilting threads, I think it turned out pretty great! It’s also the first time I’ve pre-washed a quilt and gotten to see it crinkle. I’ve always been scared the quilt would shred in the wash with my rental-unit washing machines, and I wanted the recipient to at least see my hard work first!
She’s expecting a boy. Which of course reminds me of this meme:
There was only so long I could use scraps from my stash instead of buying new fabric. I may have gone on a bit of a spree. But at least I have a plan for every single yard purchased!
I plan to use Alexia Abegg’s Michelle My Belle pattern (in the book Liberty Love) to make a dress with this swan fabric. Of course, if I decide to move away from the Michelle My Belle pattern, I could also choose from among the dozen or so 1940s patterns I purchased last week…
Yep, I’m branching out and attempting (or at least planning an attempt) to sew clothing!
I also plan to use this fabric to make a reversible Christmas tree skirt. (I grew up on a farm and hope to have my own acreage someday.)
It all started when I saw a photo of the unicorn houndstooth on Instagram. I saw it was almost sold out and felt pressured to get some right away; I have waited to buy some really great fabrics in the past and missed out, to my regret! Some of this most recent fabric was even on sale… so I’ve decided not to berate myself for my fabric-buying weakness as long as these projects are finished in one year or less!